
Step-by-step

Step 1
Decorate both sides of the paper with your edding pens. Use simple patterns, wavy lines or repeated text such as the word “LOVE” or the name of the person you're giving the gift to. Symbols for special occasions are also suitable, e.g. Christmas trees for Christmas gifts. Remember, only parts of the pattern will be visible when the bag is folded, but if you decorate the paper creatively on both sides your gift bag will be patterned both inside and out. Naturally, you can still add finishing touches after you've finished folding – little hearts, stars or dots, perhaps.
Step 2
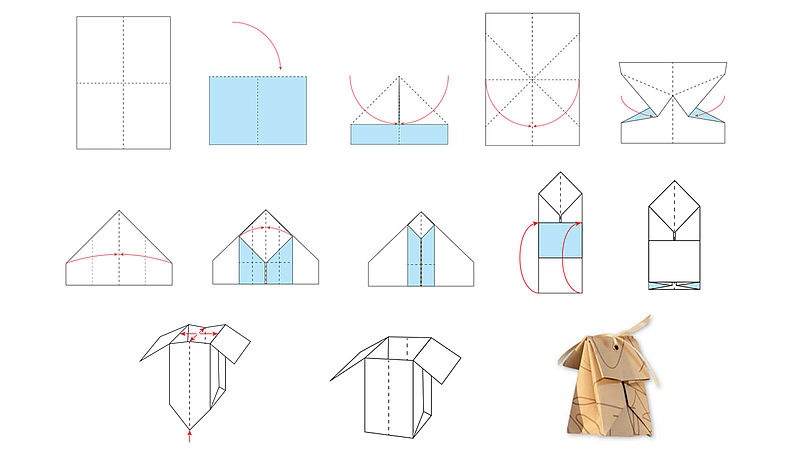
Fold the sheet as described in the following 12 steps. If you wish, punch a hole in the top and tie the bag closed with a pretty ribbon.
Products and materials

Other materials
- A sheet of paper. For a smaller gift bag (suitable for 3-4 chocolates, for example) A4 size paper is sufficient; for a larger bag, ideal for biscuits, use A3.
- If you want to tie the top of the bag, you'll need a hole punch and a length of narrow ribbon.
Related ideas

Individual gift jar
Small gifts, beautifully packaged
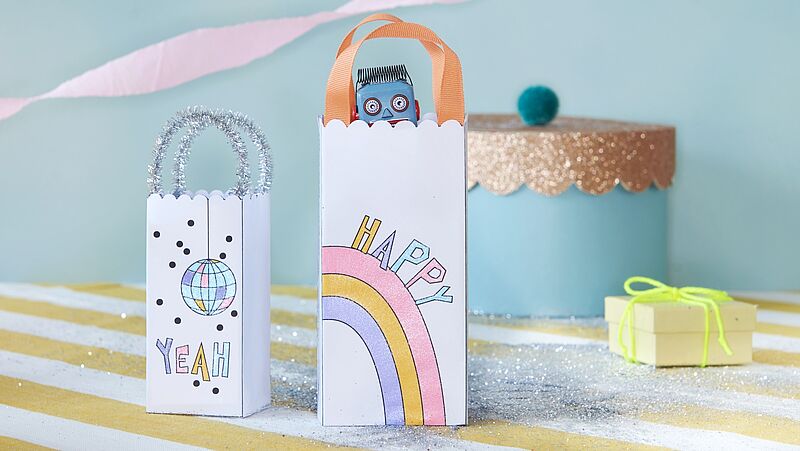
Glittery gift bags
Cool pens for gifts with a glittery look

Gift wrap with the wow factor
Design decorative wrapping paper and gift tags

Summer gift tags
Ice cream that’s guaranteed not to melt!
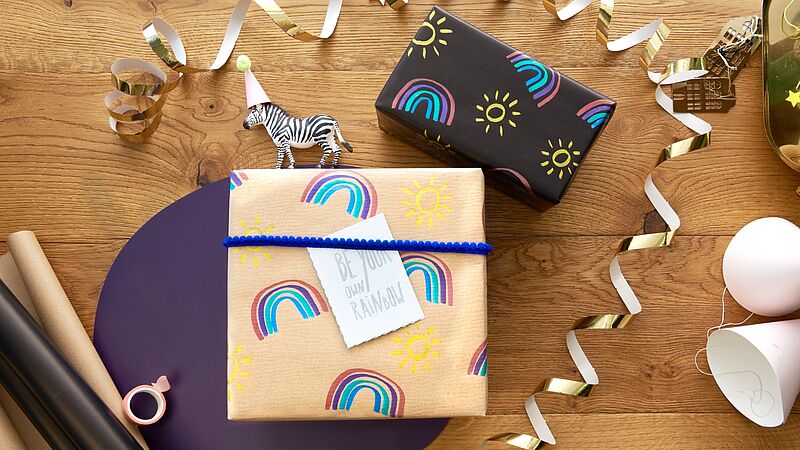
Gift wrap in brilliant colours
Gleaming creations on dark and light-coloured paper

Inspired by nature
Gift-wrap idea using wood slices
Creative Newsletter
Subscribe to our newsletter, and we’ll send you inspirational and creative DIY ideas, along with details of our latest products and special offers.