
Step-by-step
Step 1
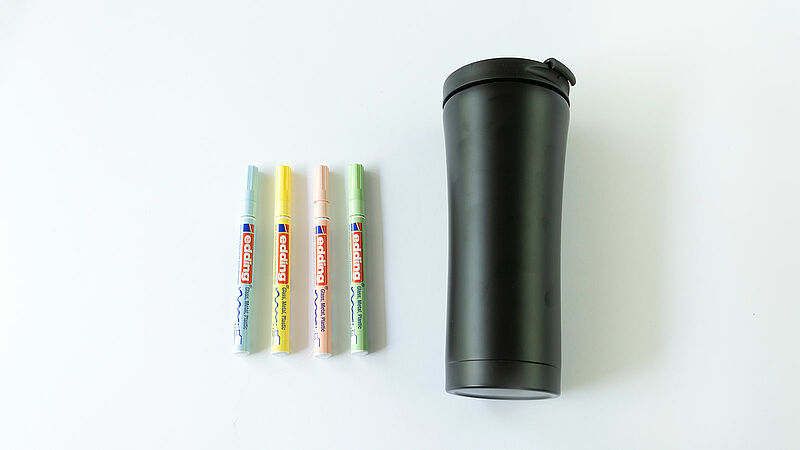
For the leaves, select gloss paint markers in two or more colours. In our example, we used pastel rose (colour code 138) and pastel green (137).
Step 2
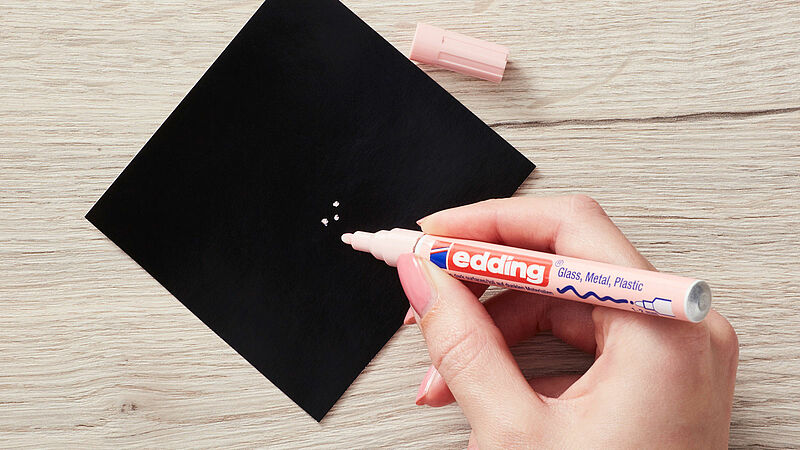
Before using a gloss paint marker, you need to activate it: shake the marker vigorously with the cap still on; remove the cap, place the nib on absorbent paper and pump it up and down a few times until ink appears in the nib. Now you’re ready to get started. And when you’ve finished, always store the marker horizontally.
Step 3
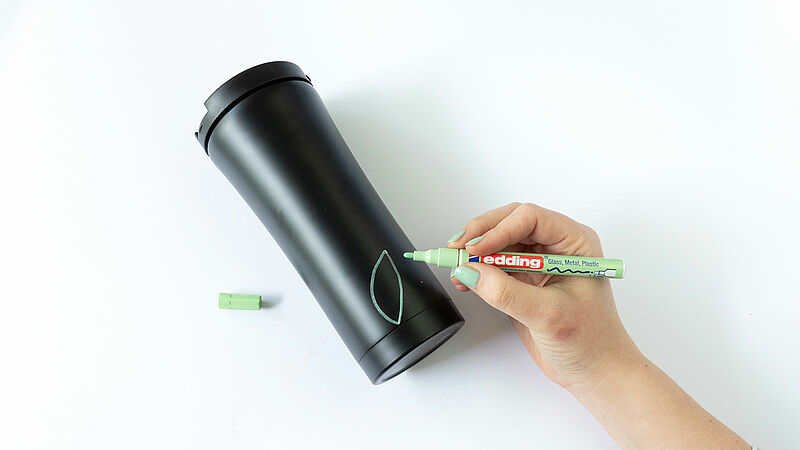
Start by drawing the outline of the first leaf; it can be shaped like a small water droplet. If you’re working with several colours, always let one colour dry briefly before continuing with the next.
Step 4
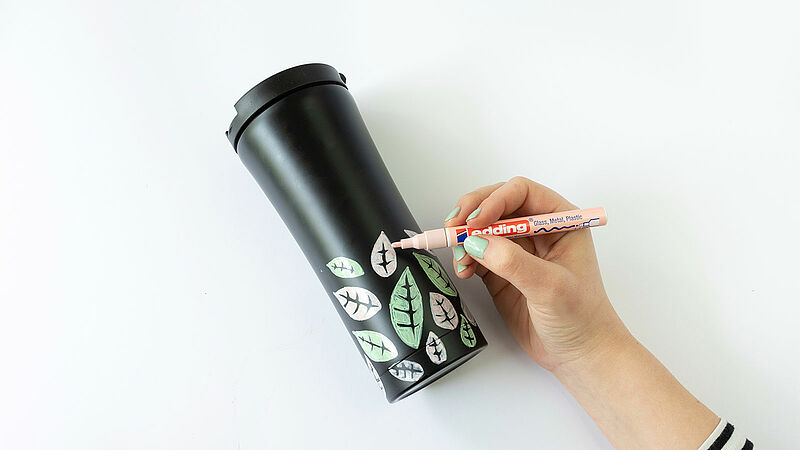
Now colour in the leaf, leaving out the leaf veins, as they can stay the same colour as your mug.
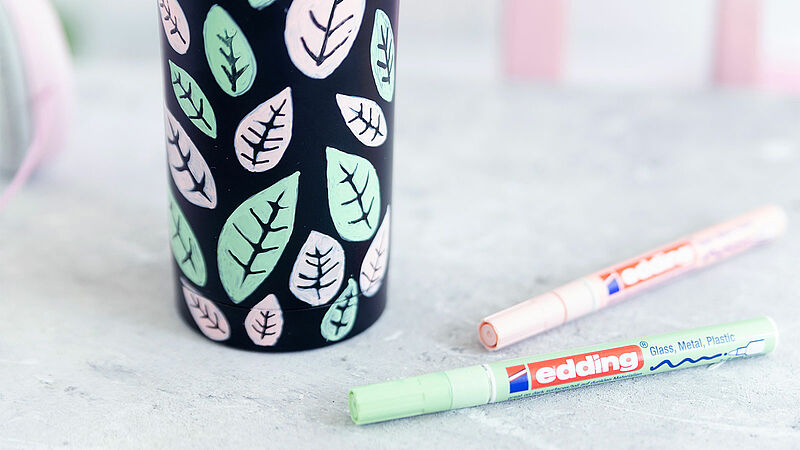
Step 5
Continue drawing leaves of different sizes until the mug is covered in colourful pastel foliage. Your new travel accessory is finished – enjoy!
Products and materials

Other materials
- Plastic insulated cup in a dark colour
Related ideas

From old plates to stylish wall art
Upcycling idea for gran’s old porcelain

Handmade wine labels
Beautifully designed wine labels - idea for Father's Day
DIY shopping bags
Trendy bag designs – the easy way
Photo styling
Design your own photo gifts with ease

Surprise!
Glitter card with the wow factor

For magical moments
A glittery look for your party
Creative Newsletter
Subscribe to our newsletter, and we’ll send you inspirational and creative DIY ideas, along with details of our latest products and special offers.