
Step-by-step
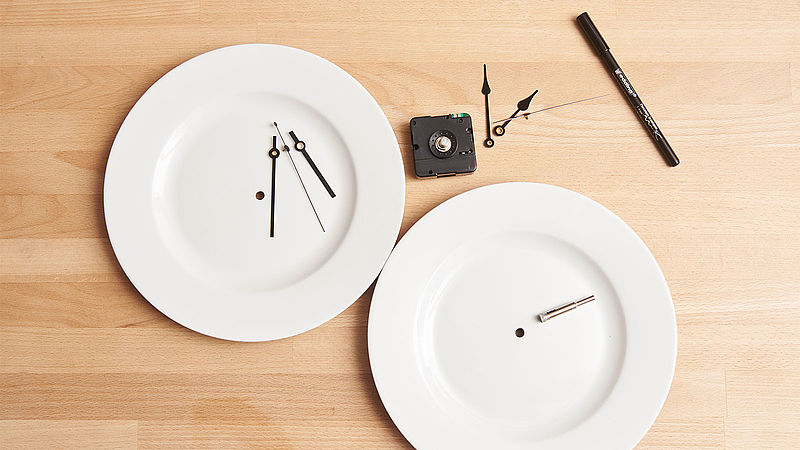
Step 1
First, drill a hole carefully in the centre of the plate with the porcelain drill. For best results, wash the plate with water (a dishwasher is ideal for this) and then wipe over with methylated spirits.
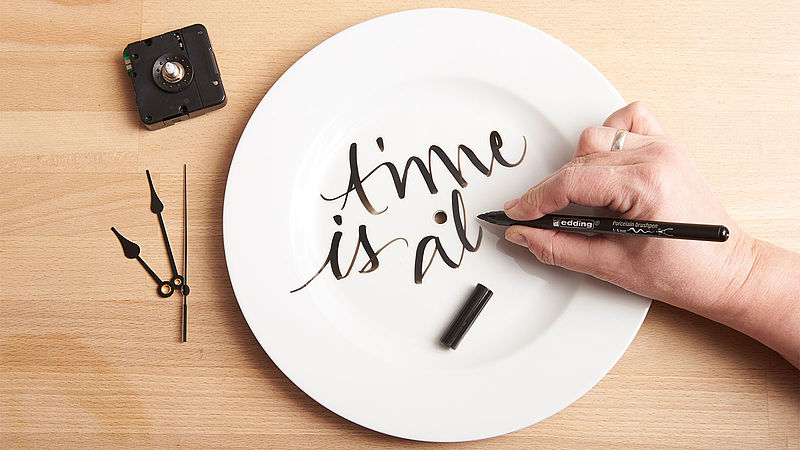
Step 2
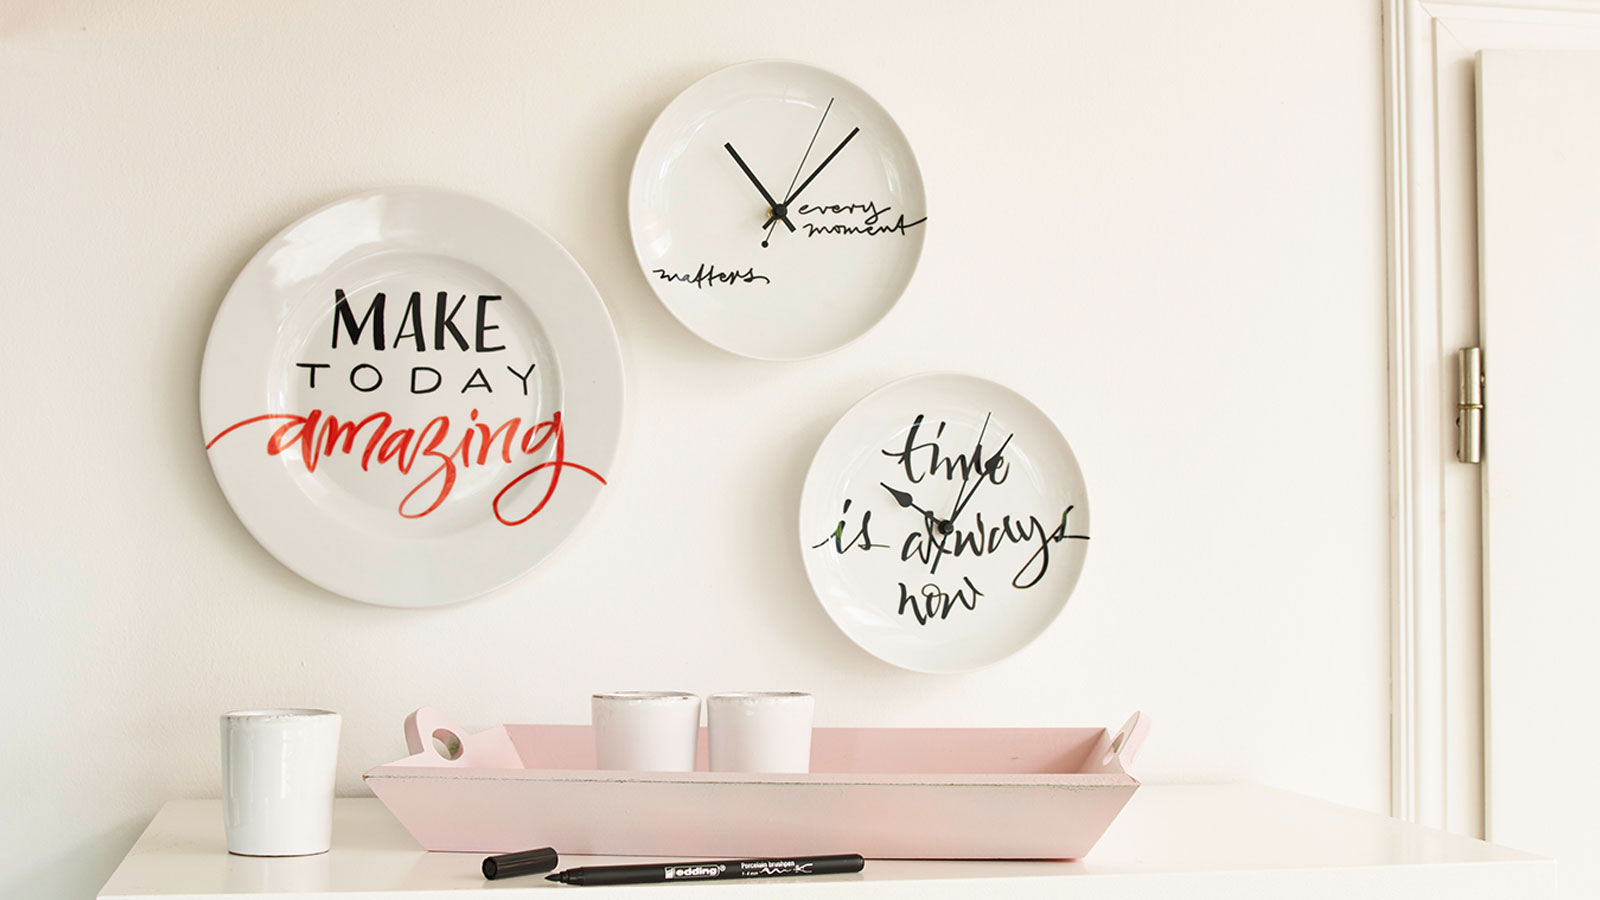
The tip of the brush pen is very versatile, allowing you to create very fine lines by applying only the tip, or broader brush strokes by holding the pen flatter.
We recommend practising the words you want to write on a piece of paper beforehand. Hand drawn letters can be rounded or angular, written in script or block font, or coloured in. You can get great effects by using a combination of large and small text, or accentuating individual letters. There are no set rules – anything goes!
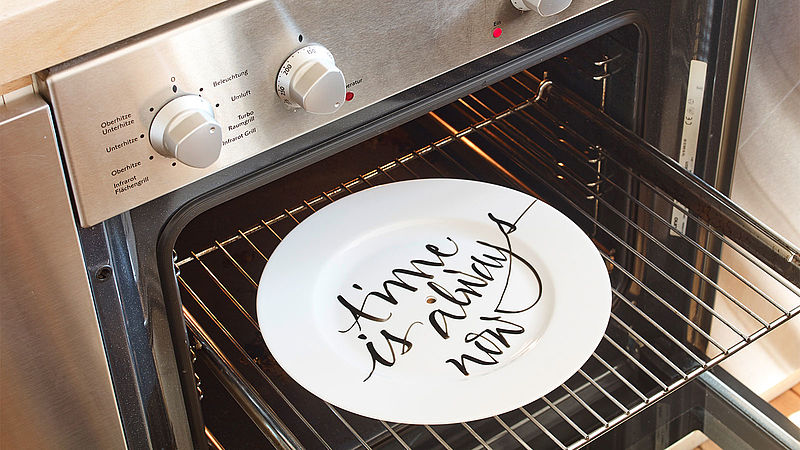
Step 3
Don’t worry if you make a mistake, you can simply wipe it off with a damp cloth or cotton bud. When you’re happy with your design, leave the plate to dry for 15 minutes. Then place it on a cold oven rack, slide it into the pre-heated oven and bake it at 160°C for 25 minutes. Leave in the oven to cool afterwards.
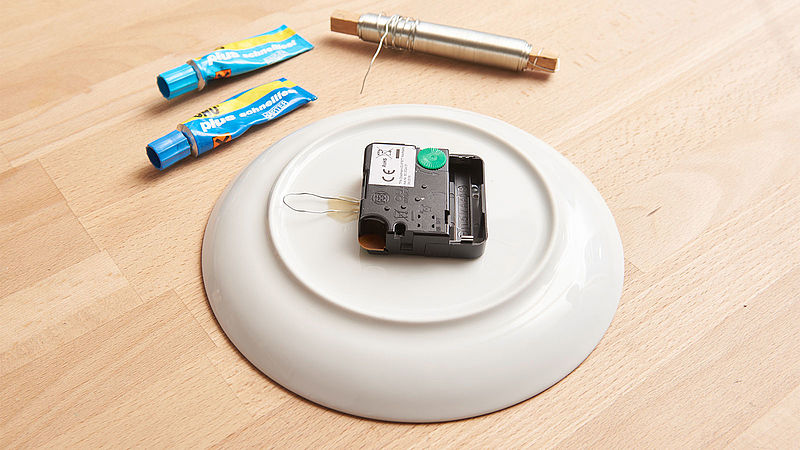
Step 4
Attach the clock mechanism to the plate and fix a length of thin metal wire securely at the back to form a small loop for wall mounting.
Products and materials

Other materials
- White plate
- Clock mechanism
- A drill suitable for porcelain; thin metal wire
- Two-part epoxy adhesive (e.g. UHU)
- Water and methylated spirits for initial cleaning
- Cotton buds or a damp cloth for wiping off any mistakes
- A conventional oven
Additional images
Related ideas

Picnic time!
Plan ahead for the perfect day out

For magical moments
A glittery look for your party

Save-the-date card
Highly effective decoration

Happy Birthday!!
Shiny metallic shades for eye-catching birthday cards

Cards with a watercolour effect
Beautiful hand lettered motifs and sentiments

Chalkboard design statement
A beautiful focal point for your home
Creative Newsletter
Subscribe to our newsletter, and we’ll send you inspirational and creative DIY ideas, along with details of our latest products and special offers.