
Step-by-step
Step 1
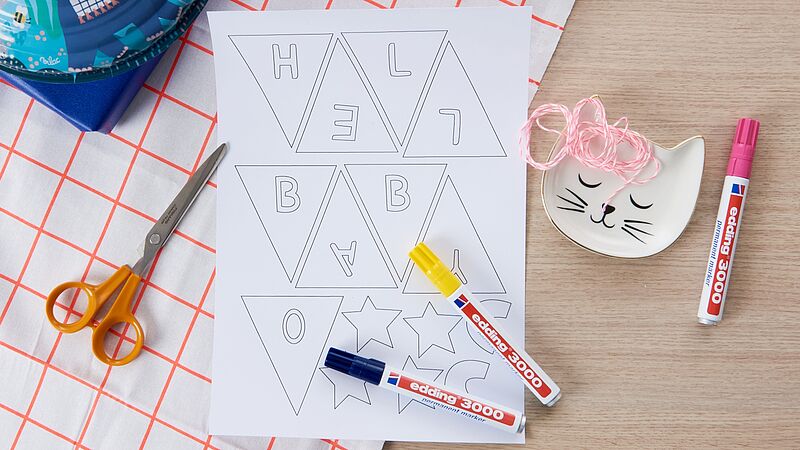
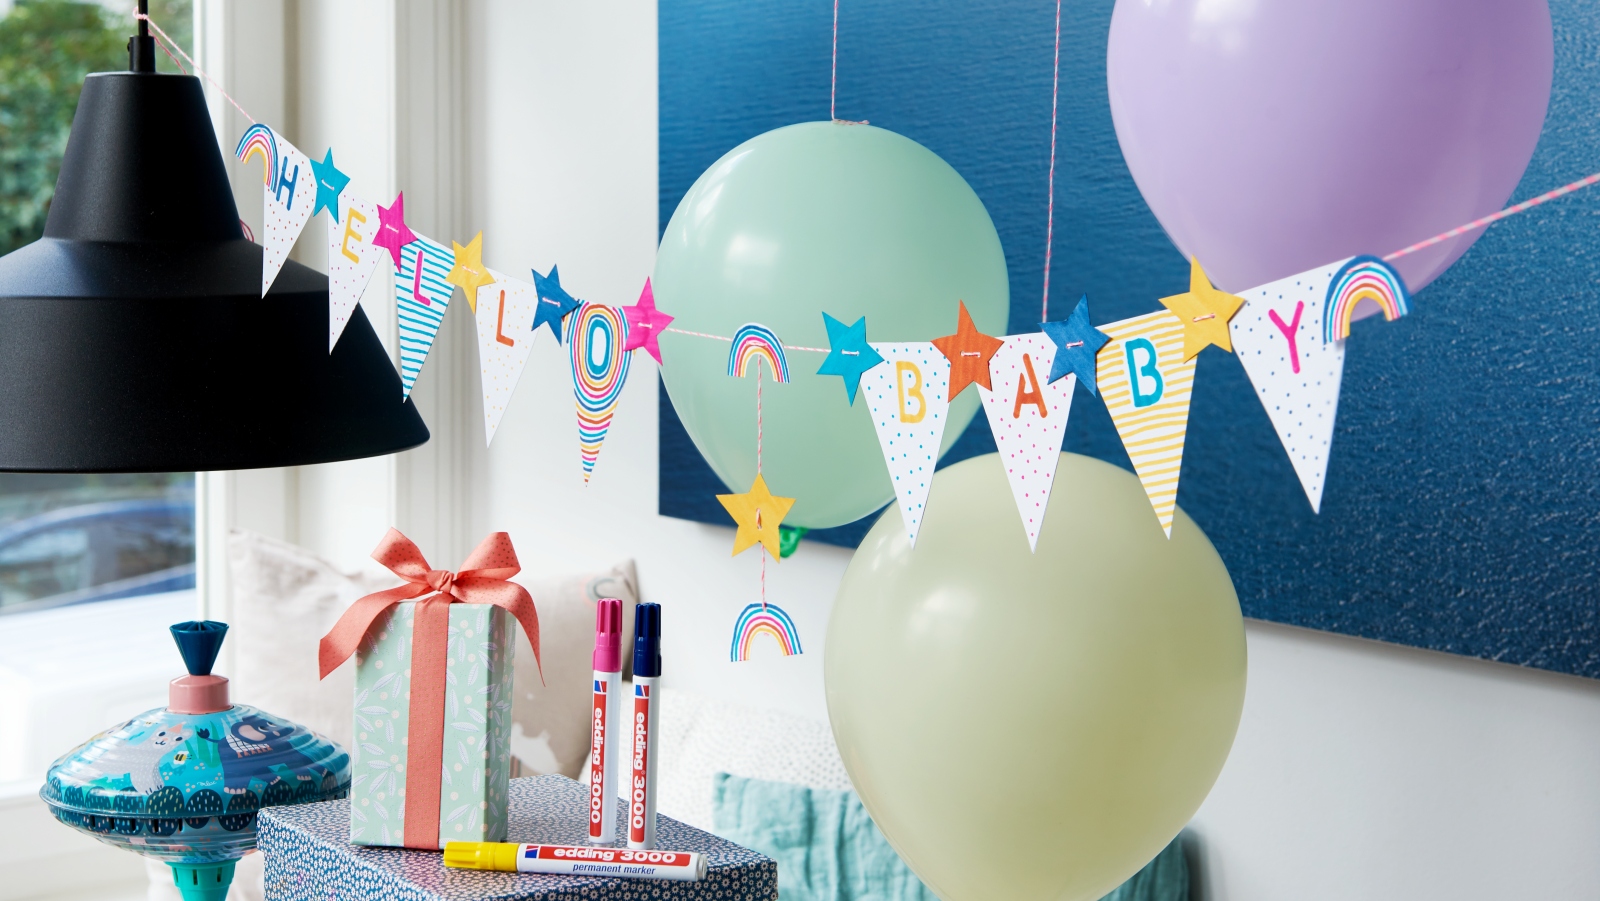
You can see all the materials you need at a glance in our photo. For our design, we chose the classic edding 3000 marker with a medium wide nib. Pick your favourite colours from our range, now including brand new sets of 5 available in carefully coordinated shades. First, print out the template (it's best to use quite thick paper for this) and cut out all the parts that make up the garland.
Step 2
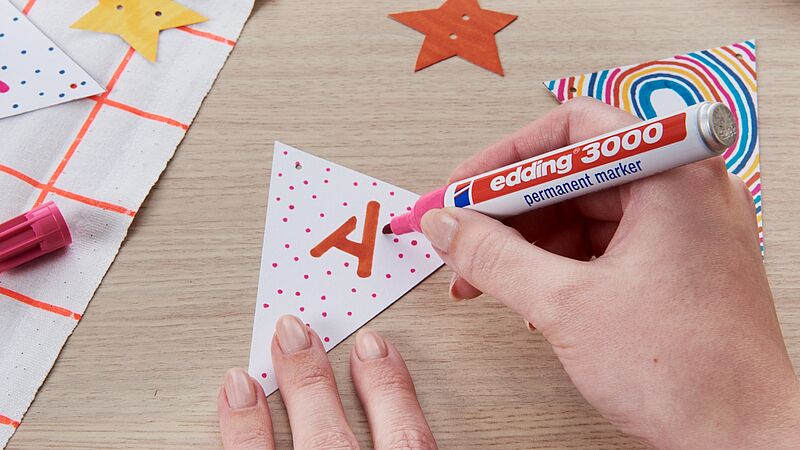
Use the permanent markers to decorate the individual flags with colourful stripes, swirls, dots – whatever takes your fancy. Fill in the letters in your chosen style, then colour in the stars.
Step 3
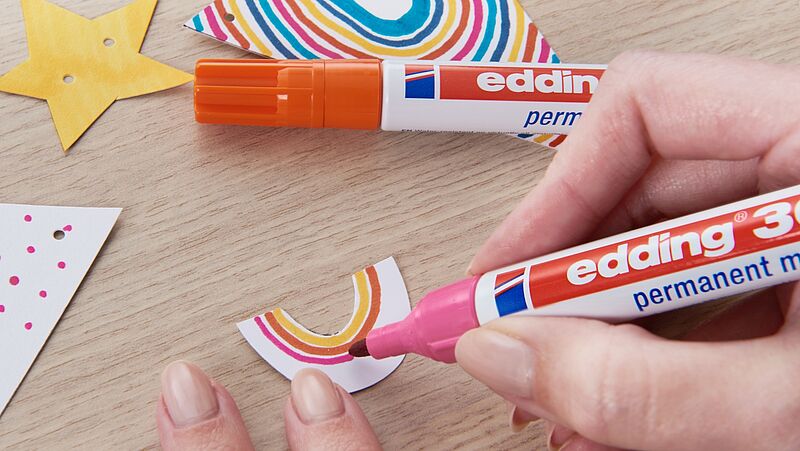
To make the bunting extra bright and cheerful, you can add a different pattern or colour to each flag.
Step 4
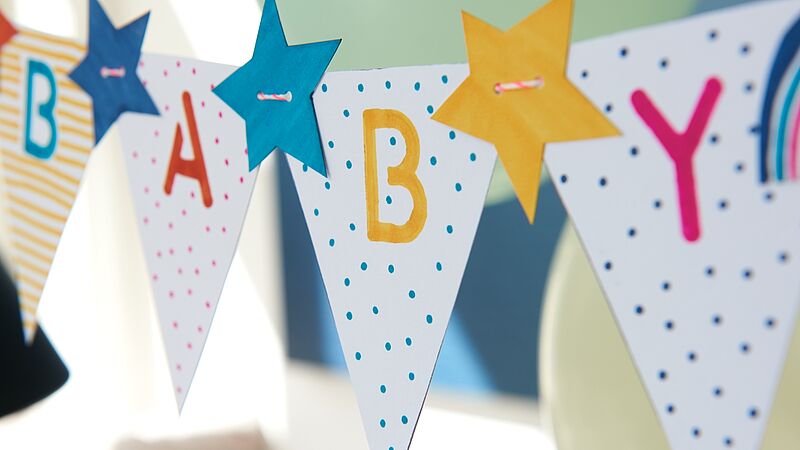
To finish off, punch a hole in each shape and carefully thread them onto the string. After making sure the letters are in the right order, hang up your garland in a prominent place where everyone can see it.
Products and materials

Other materials
- "Hello Baby" template
- Scissors
- Suitable string or cord
- Hole punch
Templates

Hello Baby
Additional images
Related ideas

Create your own concrete look
Unique upcycled bedside table

Upcycling idea for an old chest of drawers
A stylish new look for planters

Placemat upcycling idea
A stylish addition for your dinner table

Your very own designer side table
Create an eye-catching piece of furniture with this fun upcycling project
Repair scratches in your wooden floor
DIY hack: the simple way to get rid of dents and scratches
Magical flowers on your window
Decorate your windows and glass doors with striking floral designs
Creative Newsletter
Subscribe to our newsletter, and we’ll send you inspirational and creative DIY ideas, along with details of our latest products and special offers.