
Step-by-step
Step 1
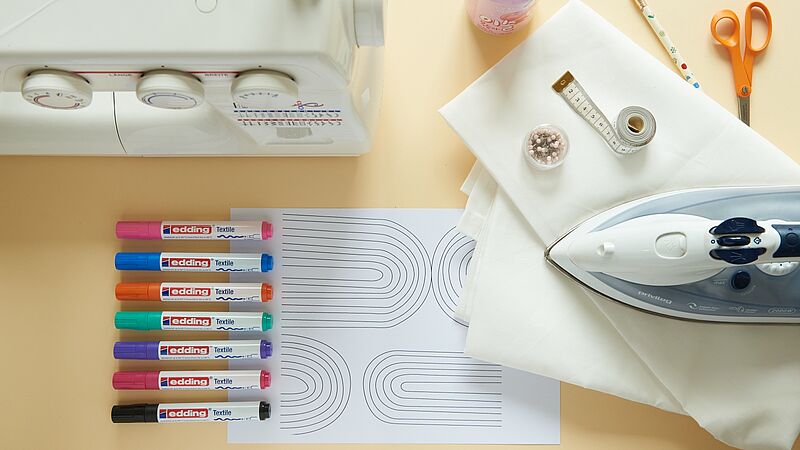
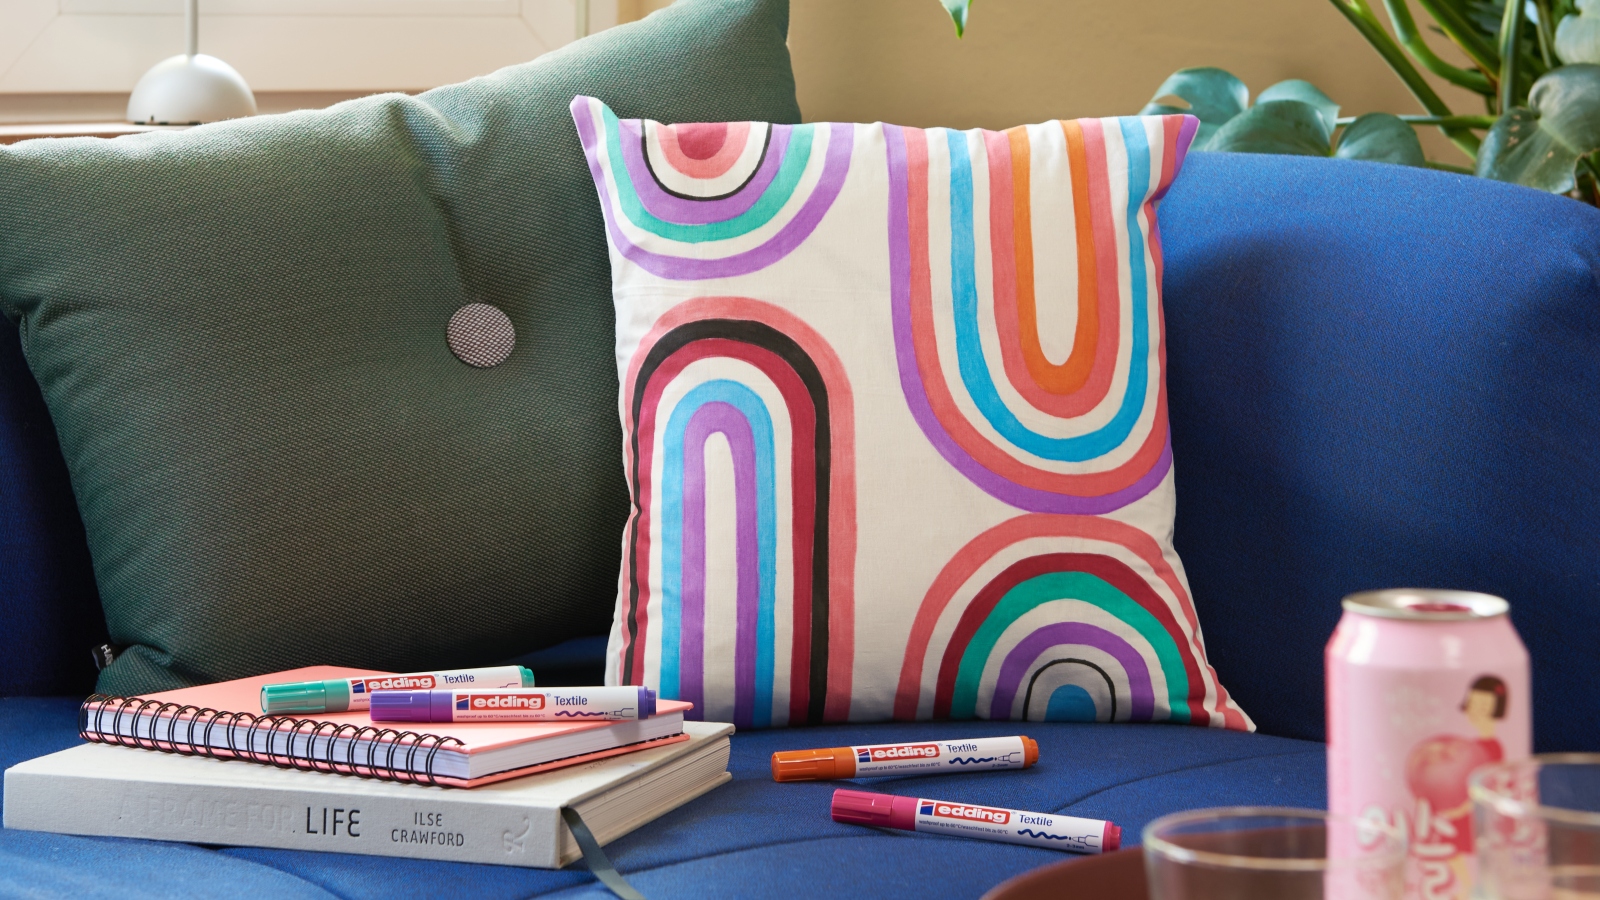
If you’ve got access to a sewing machine, you can easily make the cushion cover yourself. You’ll find detailed instructions for this in step 5. Firstly, wash, dry and iron the fabric to ensure that the ink will be properly absorbed. The edding 4500 textile marker is available in 20 different colours, so choose your favourites. The template is available to download from our website.
Step 2
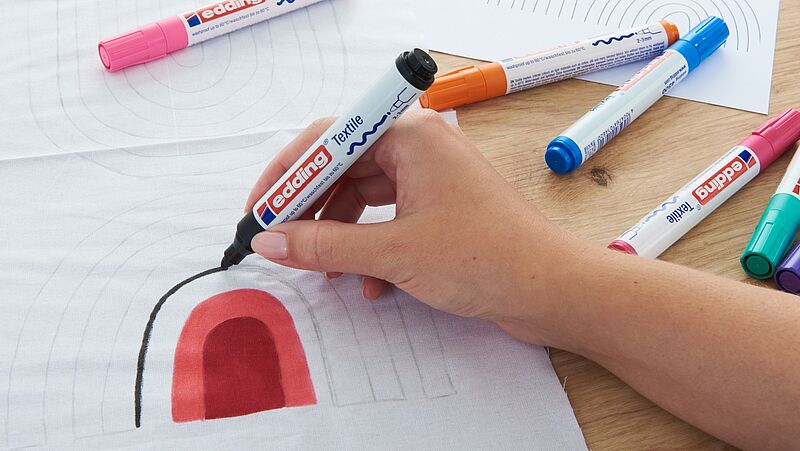
Place the template on the cardboard base and then centre the cardboard underneath the fabric (or inside the cover) so that the template is clearly visible. Use a pencil to copy the outlines from the template. Next, colour in the individual arches using the textile markers.
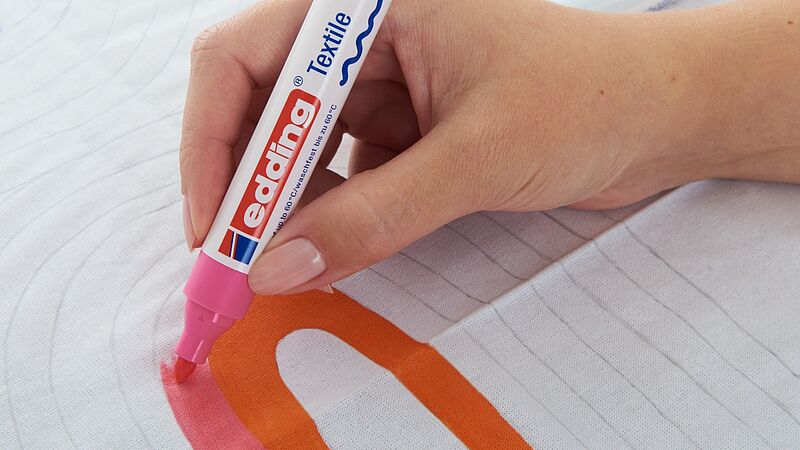
Step 3
Colour in each area within the motif, one section at a time. We recommend letting each section of colour dry thoroughly before starting on the next colour. This will prevent the colours from running into each other.
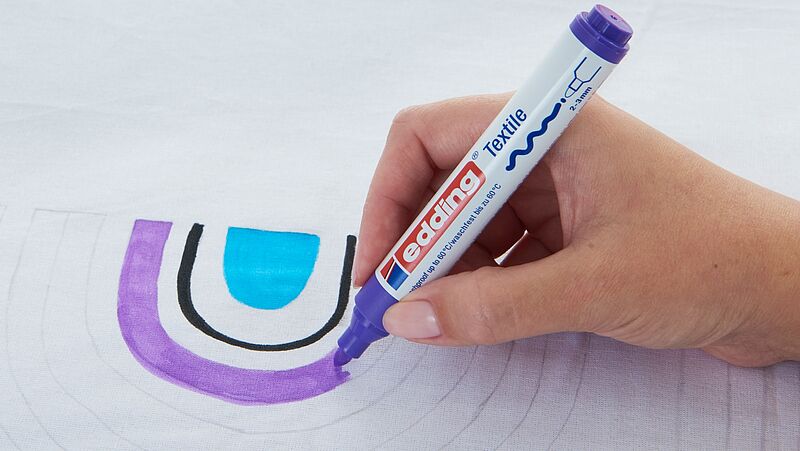
Step 4
In this photo, you can see the motif developing as neon violet is added.

Step 5
Sewing instructions:
- Fold a double hem, roughly 1 cm, at both narrow ends of the fabric. Pin in place and then use your sewing machine to stitch.
- Next, lay the fabric on the table with the decorated side facing upwards. Take the hemmed edges and fold them on top of each other so that they cover the design. Pin the fabric in place and then use the sewing machine to sew up the open sides.
- This will leave a central opening for the cushion insert.
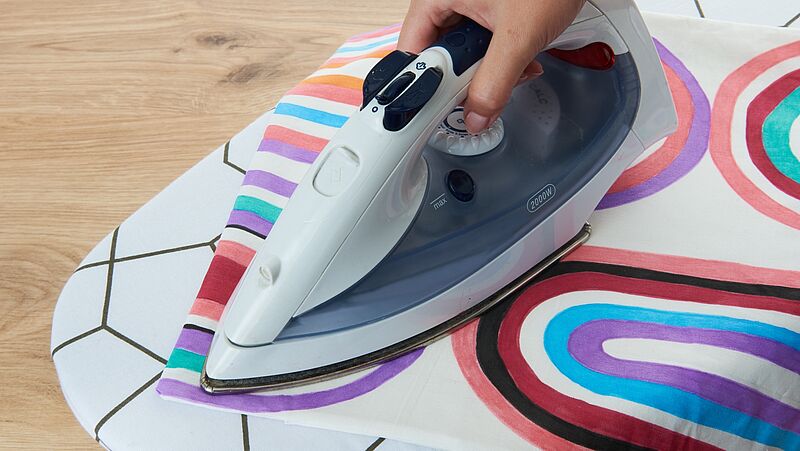
Step 6
Turn the cushion cover the right way out and fix the decorated motif by ironing it on the no-steam setting. It will now withstand washes of up to 60°C.
On particularly cold days, you can also put a heated cushion inside the cover.
Products and materials

Other materials
- Light-coloured cotton cushion cover (approx. 40 x 40 cm), or alternatively white cotton fabric measuring 42 cm x 110 cm if you want to sew the cover yourself
- Cardboard to place under your design
- Template
- Pencil
- Scissors
- Pins
- Sewing machine with co-ordinating thread
- Iron


Additional images
Related ideas

Create your own concrete look
Unique upcycled bedside table

Upcycling idea for an old chest of drawers
A stylish new look for planters

Placemat upcycling idea
A stylish addition for your dinner table

Your very own designer side table
Create an eye-catching piece of furniture with this fun upcycling project
Repair scratches in your wooden floor
DIY hack: the simple way to get rid of dents and scratches
Magical flowers on your window
Decorate your windows and glass doors with striking floral designs
Creative Newsletter
Subscribe to our newsletter, and we’ll send you inspirational and creative DIY ideas, along with details of our latest products and special offers.