
Step-by-step
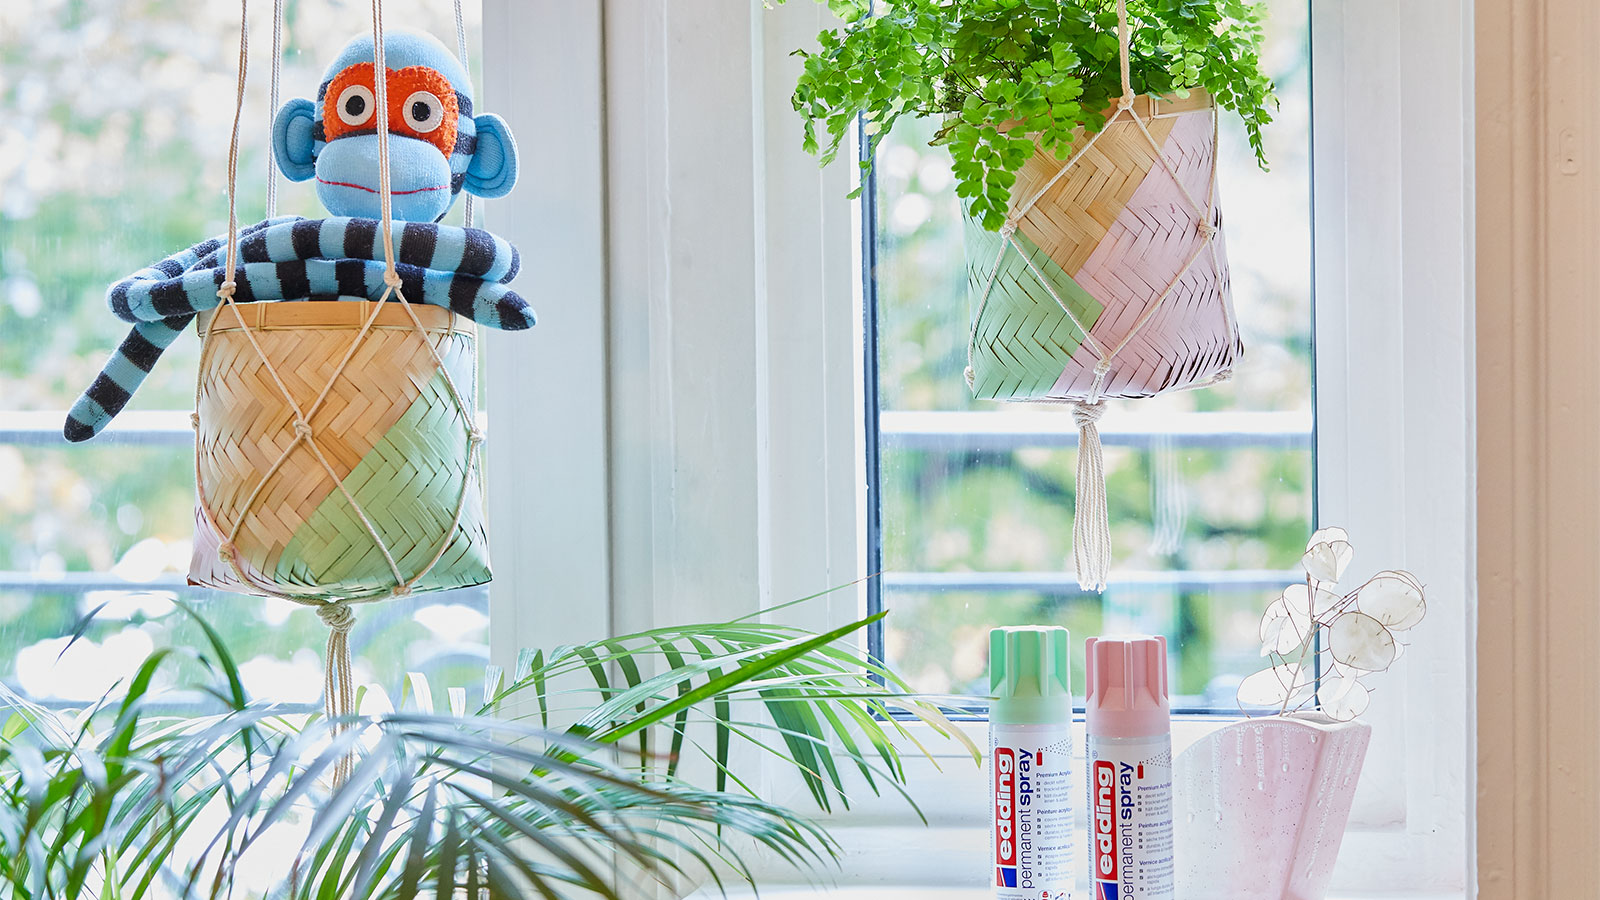
Step 1
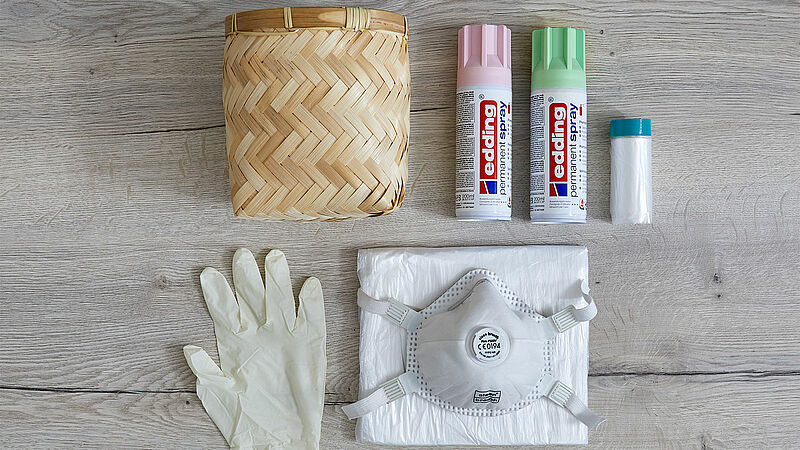
Make sure you’ve got all your materials ready before you start. For our basket design, we chose the trend colours neo mint (colour code 939) and pastel rose (914).
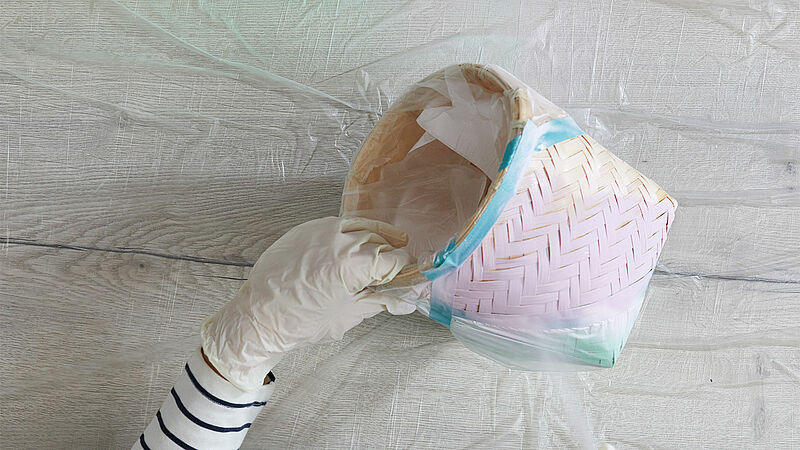
Step 2
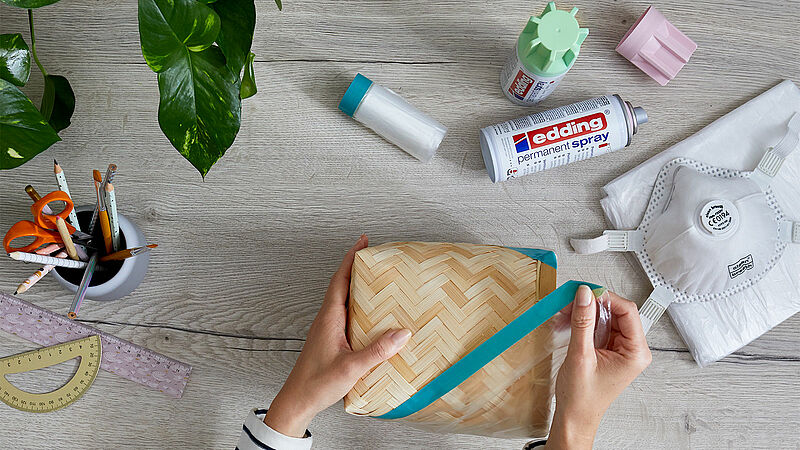
First, use the pre-taped film to mask the section of the basket that you want to stay natural-looking. Make sure the edge of the film is securely sealed to stop the paint going where it shouldn’t. Don’t forget to cover the rim and the inside of the basket, too.

Step 3
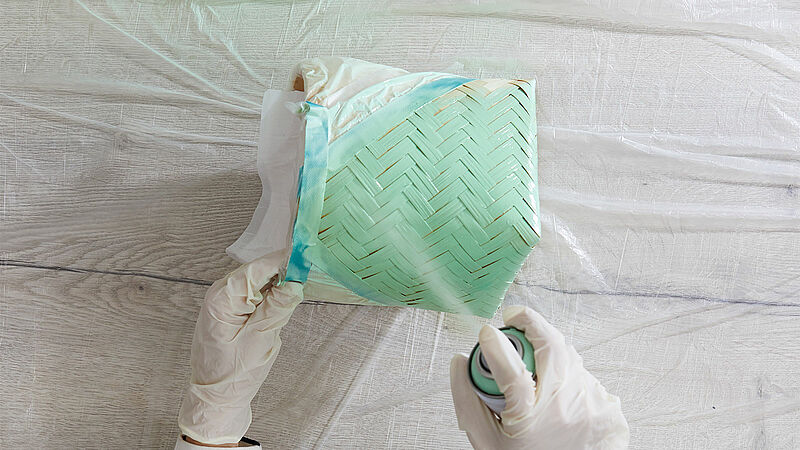
Carefully cover your work surface with masking film. Start by shaking the spray can for 3 minutes, then remove the sprayhead and prise off the safety ring with the aid of the screwdriver.
Step 4
We recommend you spray continuously at a distance of around 25 cm, using horizontal and vertical strokes, so that the paint covers more evenly. In our Spray basics section we’ve got handy tips on how to achieve a perfect spraying technique. Use rapid strokes, and don’t spray too long in one spot.
Step 5
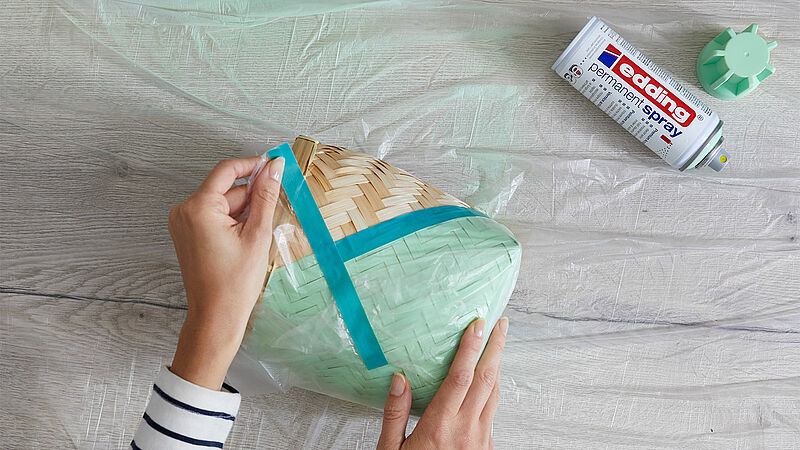
Let the paint dry for about 30 minutes before carefully removing the film. To continue your design with a second colour, repeat steps 2 to 4. Again, carefully mask any areas you don’t want painted.
Step 6
Once that’s done, you can start spraying the next colour (in this case, pastel rose). For a fascinating effect, try overlapping the colours here and there. When everything is thoroughly dry, carefully suspend the basket in a suitable pot hanger.
Products and materials

Other materials
- Hanging pot plant holders
- Protective base layer for spraying
- Masking film with adhesive edge strip
- Gloves, breathing mask (optional)
- Screwdriver (for removing the safety ring)
- Scissors
- A means to suspend your baskets
Video
Additional images
Related ideas

Create your own concrete look
Unique upcycled bedside table

Upcycling idea for an old chest of drawers
A stylish new look for planters

Placemat upcycling idea
A stylish addition for your dinner table

Your very own designer side table
Create an eye-catching piece of furniture with this fun upcycling project
Repair scratches in your wooden floor
DIY hack: the simple way to get rid of dents and scratches
Magical flowers on your window
Decorate your windows and glass doors with striking floral designs
Creative Newsletter
Subscribe to our newsletter, and we’ll send you inspirational and creative DIY ideas, along with details of our latest products and special offers.