
Step-by-step
Step 1
Here’s how to activate the edding matt paint marker before use: Shake the marker vigorously with the cap still on. Place the nib on some scrap paper and slowly pump it up and down a few times until ink flows into the nib. Try out the marker first with a few test strokes. And don’t forget to always replace the cap securely after use. Practise writing your chosen wording on a sheet of paper, to see which style you like best. Your letters can be rounded or angular, written in script or block font, or coloured in.

Step 2
Hand lettering lets you combine large and small letterforms and accentuate individual letters in a second colour to make them stand out. There are no set rules – anything goes! To add interest to the overall picture, you could add a banner, a border or some small illustrations or motifs.

Step 3
Start your artwork with the white edding 4095 marker, leave to dry for a short while and then add your pink and yellow highlights.
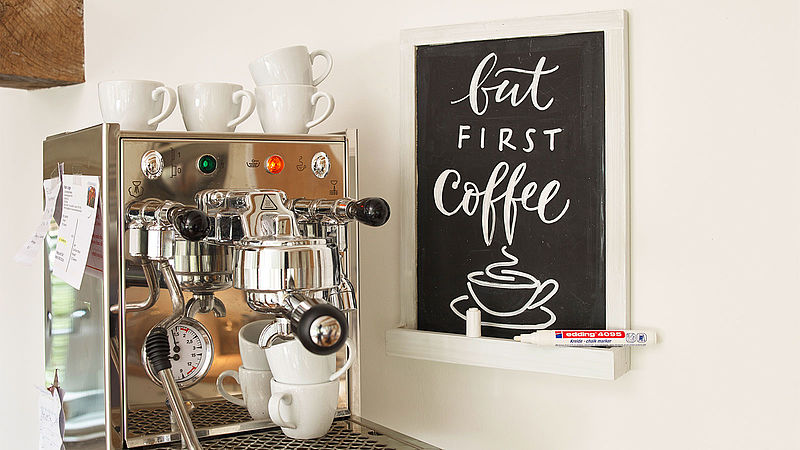
Products and materials

Other materials
- A black chalkboard, the smoother the better
- A damp cloth for wiping off any mistakes
Related ideas

Picnic time!
Plan ahead for the perfect day out

For magical moments
A glittery look for your party

Save-the-date card
Highly effective decoration

Happy Birthday!!
Shiny metallic shades for eye-catching birthday cards

Cards with a watercolour effect
Beautiful hand lettered motifs and sentiments

Chalkboard design statement
A beautiful focal point for your home
Creative Newsletter
Subscribe to our newsletter, and we’ll send you inspirational and creative DIY ideas, along with details of our latest products and special offers.