
Step-by-step
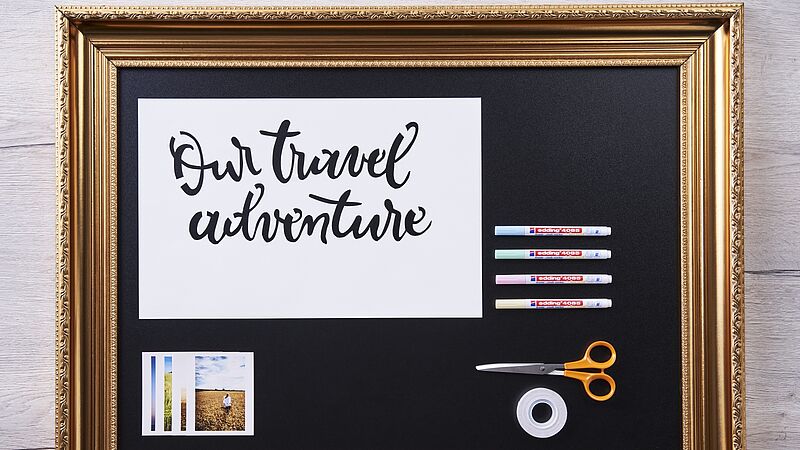
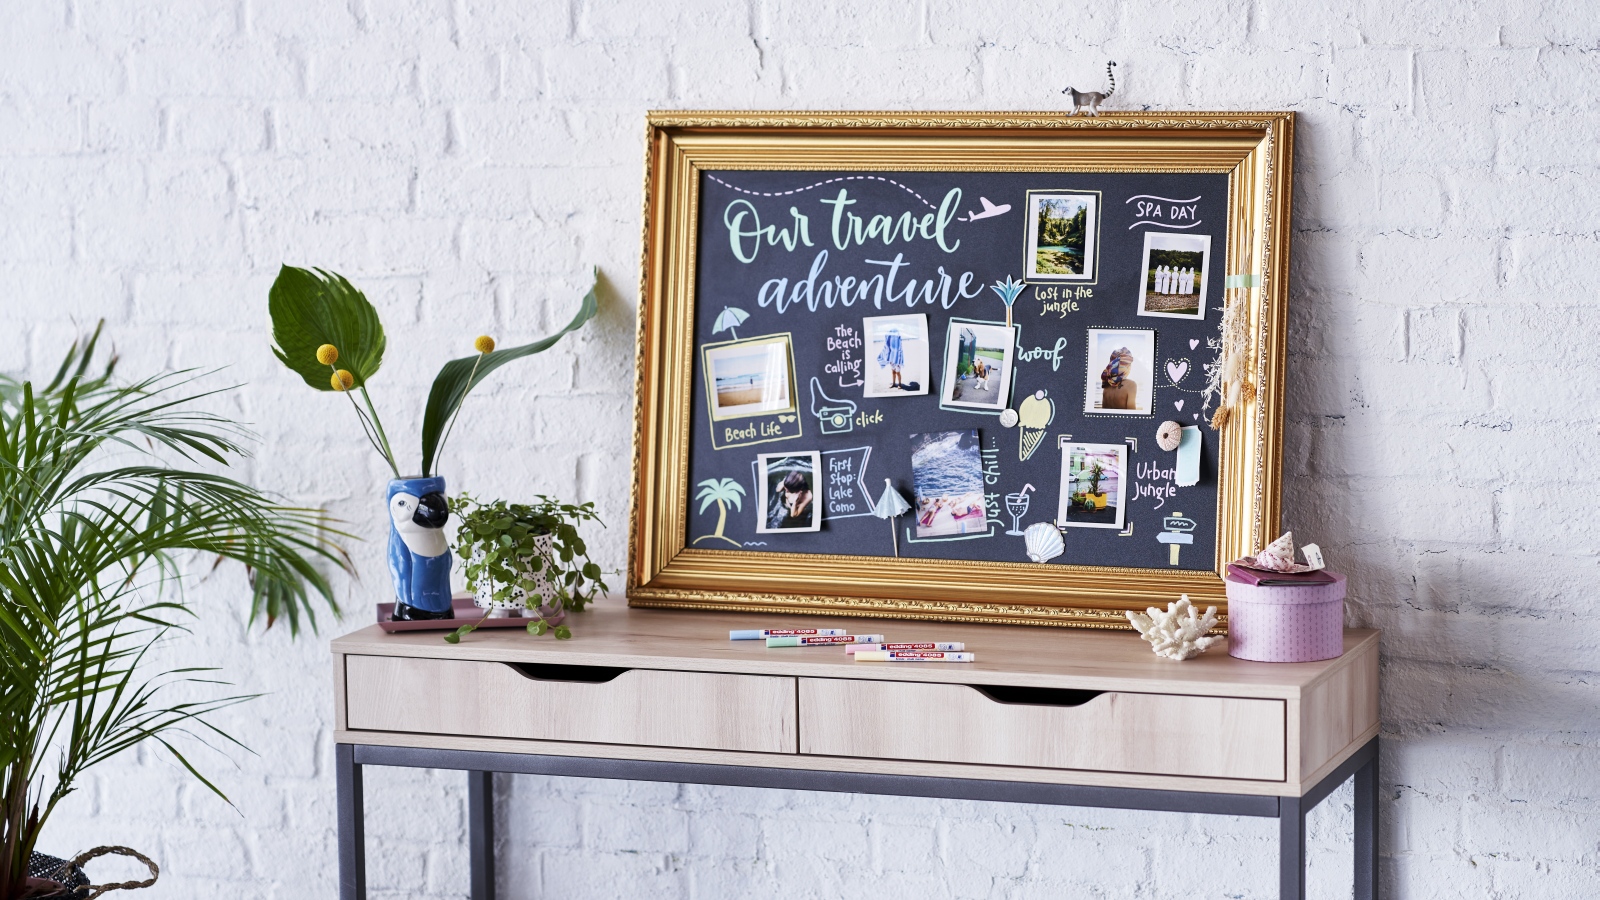
Step 1
You can see all the materials you need at a glance in our photo. To design your picture frame, you’ll need the edding 4085 chalk marker by Securit in various pastel colours and white. Start by printing out the “Our travel adventure” template and prepare your selected photos.
Step 2
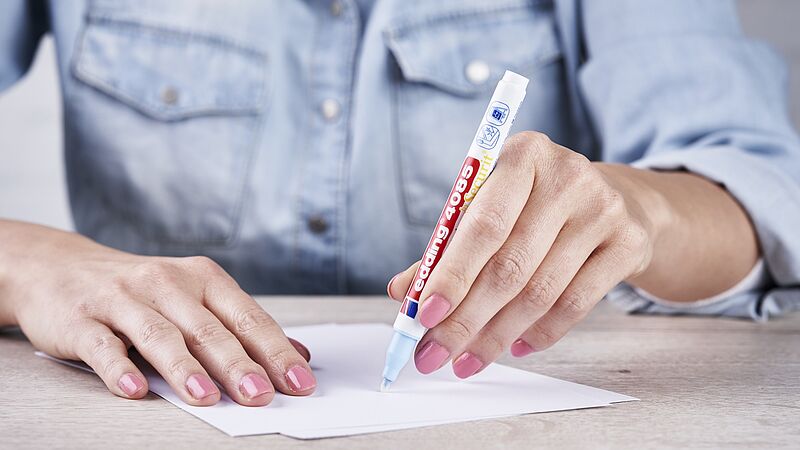
Before you start, activate the white chalk marker as follows: shake the marker vigorously with the cap on, then remove the cap, place the nib on a piece of absorbent paper and pump it up and down gently a few times until ink appears in the nib. Activate the other colours in the same way, and now you’re ready to get drawing. (After use, always replace the cap securely and store the marker horizontally.)
Step 3
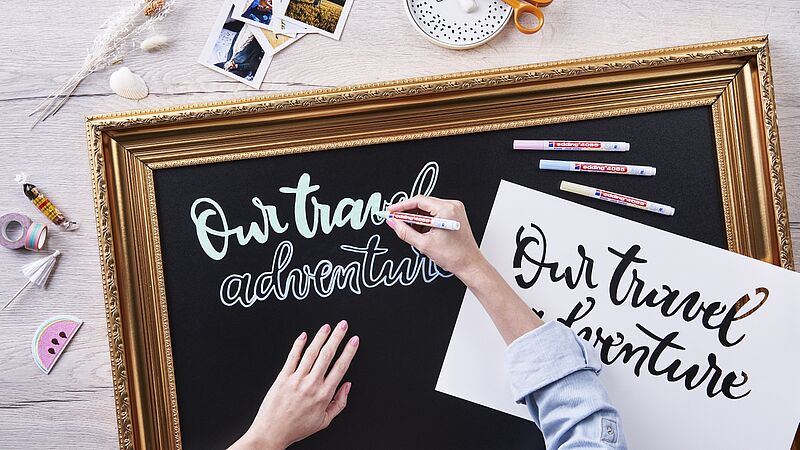
Using the template to help you, write the heading at the top of the chalkboard using the activated chalk marker. We recommend you draw the outlines of the letters first, before you colour them in. If your first attempt doesn’t quite work, or you want to change something, simply wipe off the ink with a damp cloth and have another go.

Step 4
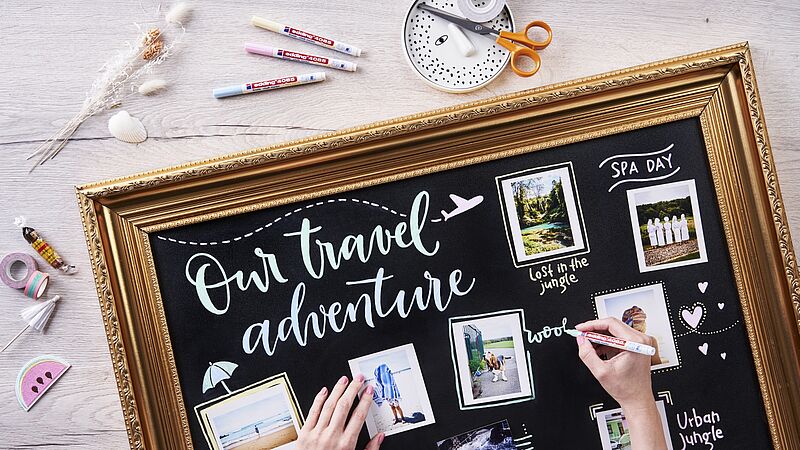
Now arrange your holiday snaps across the board and secure them with the double-sided tape. Make sure you leave plenty of space between the pictures for brief captions or drawings.
Step 5
Pick a nice colour scheme and use the edding chalk markers by Securit to add photo captions or draw frames around specific photos – it’s entirely up to you how you want it to look.

Step 6
By adding relevant drawings and small decorative touches, you can liven up your collage and produce an amazing effect.
Products and materials

Other materials
- Framed chalkboard (e.g. Gold Board by Securit)
- A piece of scrap paper for activating the marker
- Scissors
- A selection of photos
- Double-sided adhesive tape
- A damp cloth for wiping off mistakes, if needed
Templates

"Our travel adventure"
Additional images
Related ideas

Create your own concrete look
Unique upcycled bedside table

Upcycling idea for an old chest of drawers
A stylish new look for planters

Placemat upcycling idea
A stylish addition for your dinner table

Your very own designer side table
Create an eye-catching piece of furniture with this fun upcycling project
Repair scratches in your wooden floor
DIY hack: the simple way to get rid of dents and scratches
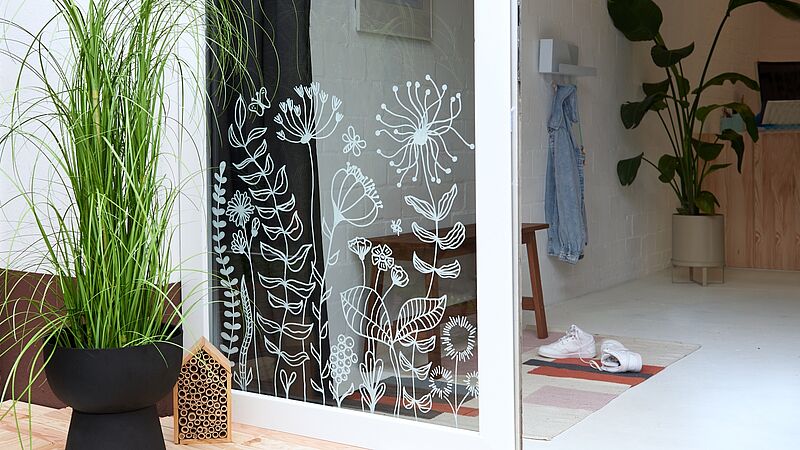
Magical flowers on your window
Decorate your windows and glass doors with striking floral designs
Creative Newsletter
Subscribe to our newsletter, and we’ll send you inspirational and creative DIY ideas, along with details of our latest products and special offers.