
Step-by-step
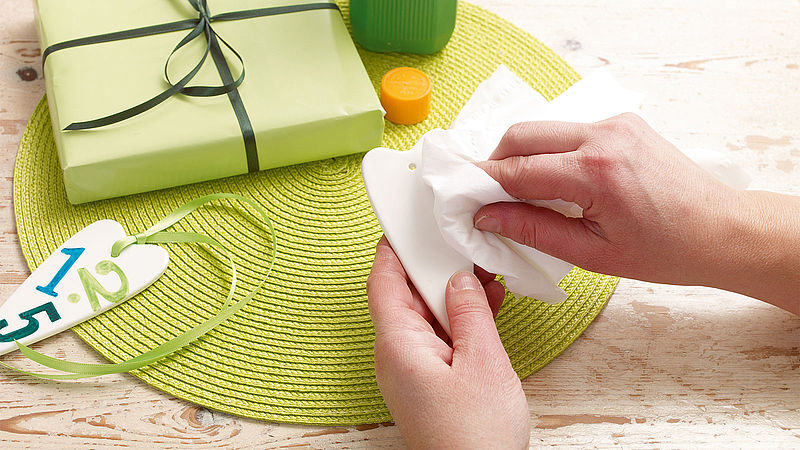
Step 1
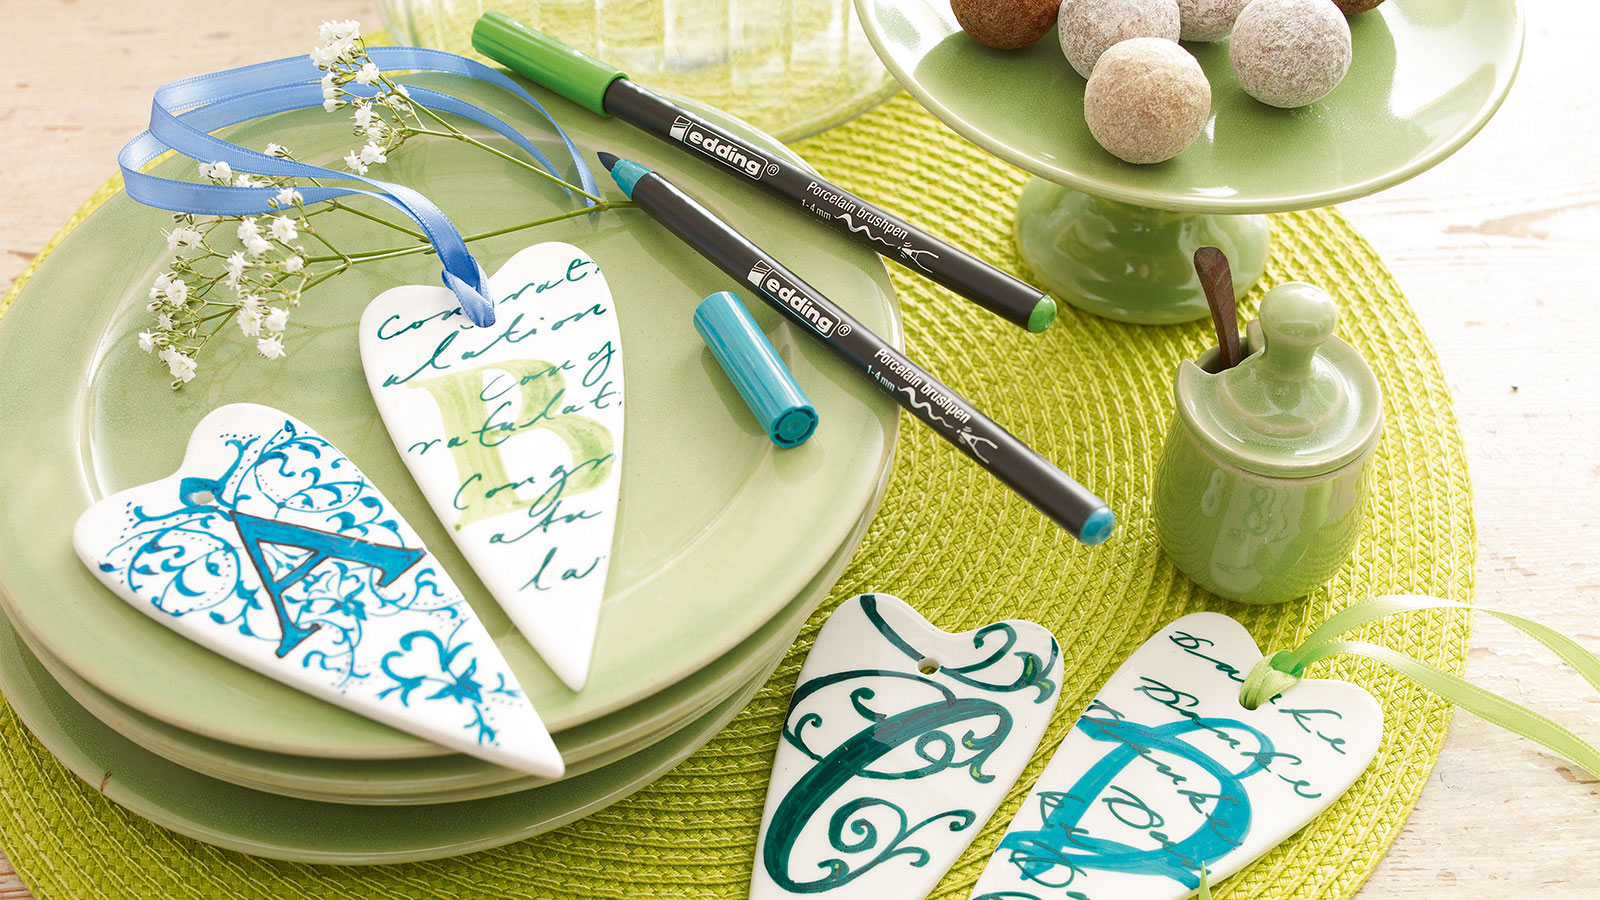
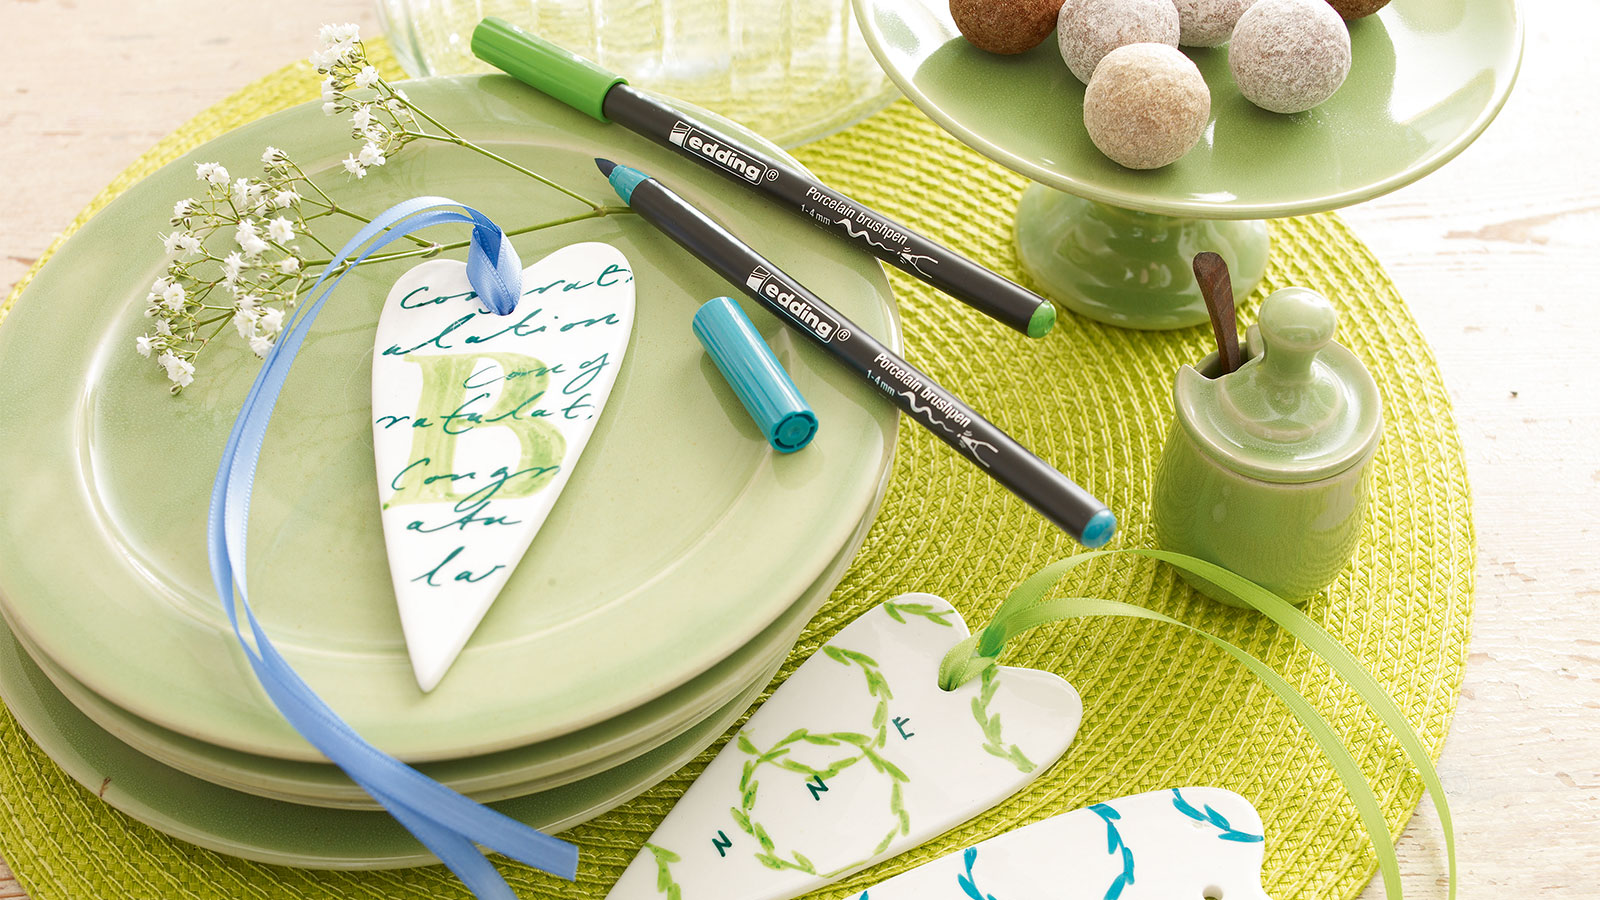
Before decorating, clean thoroughly in the dishwasher and use a detergent or methylated spirits to remove fingerprints or traces of grease. As you decorate, make sure there are no unnecessary fingerprints underneath the ink as you apply it. Only use the brushpen for decorative purposes; avoid decorating areas of the porcelain that are used for cutting, eating or drinking. For example, only decorate the rim of a plate or the outside of a mug. The porcelain brushpens are ready to use without the need to pump the ink and are impressively easy to handle. The tip of the brushpen is flexible, allowing you to create very fine lines or broader brush strokes. What’s more, the creamy consistency ensures that the paint is distributed evenly, without forming drips.
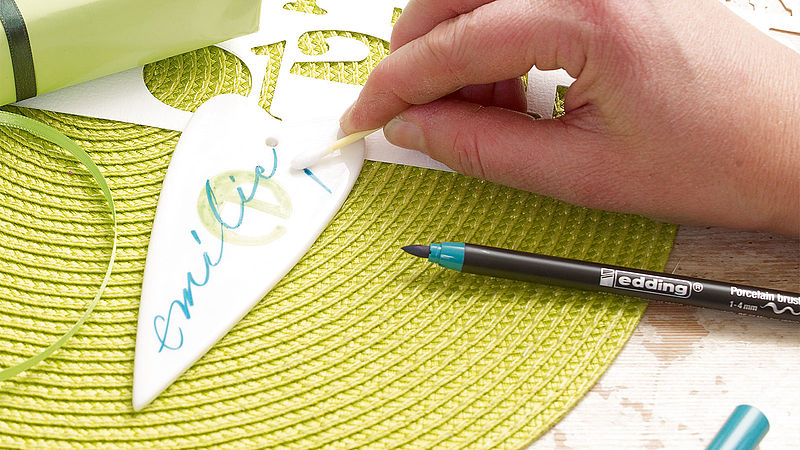
Step 2
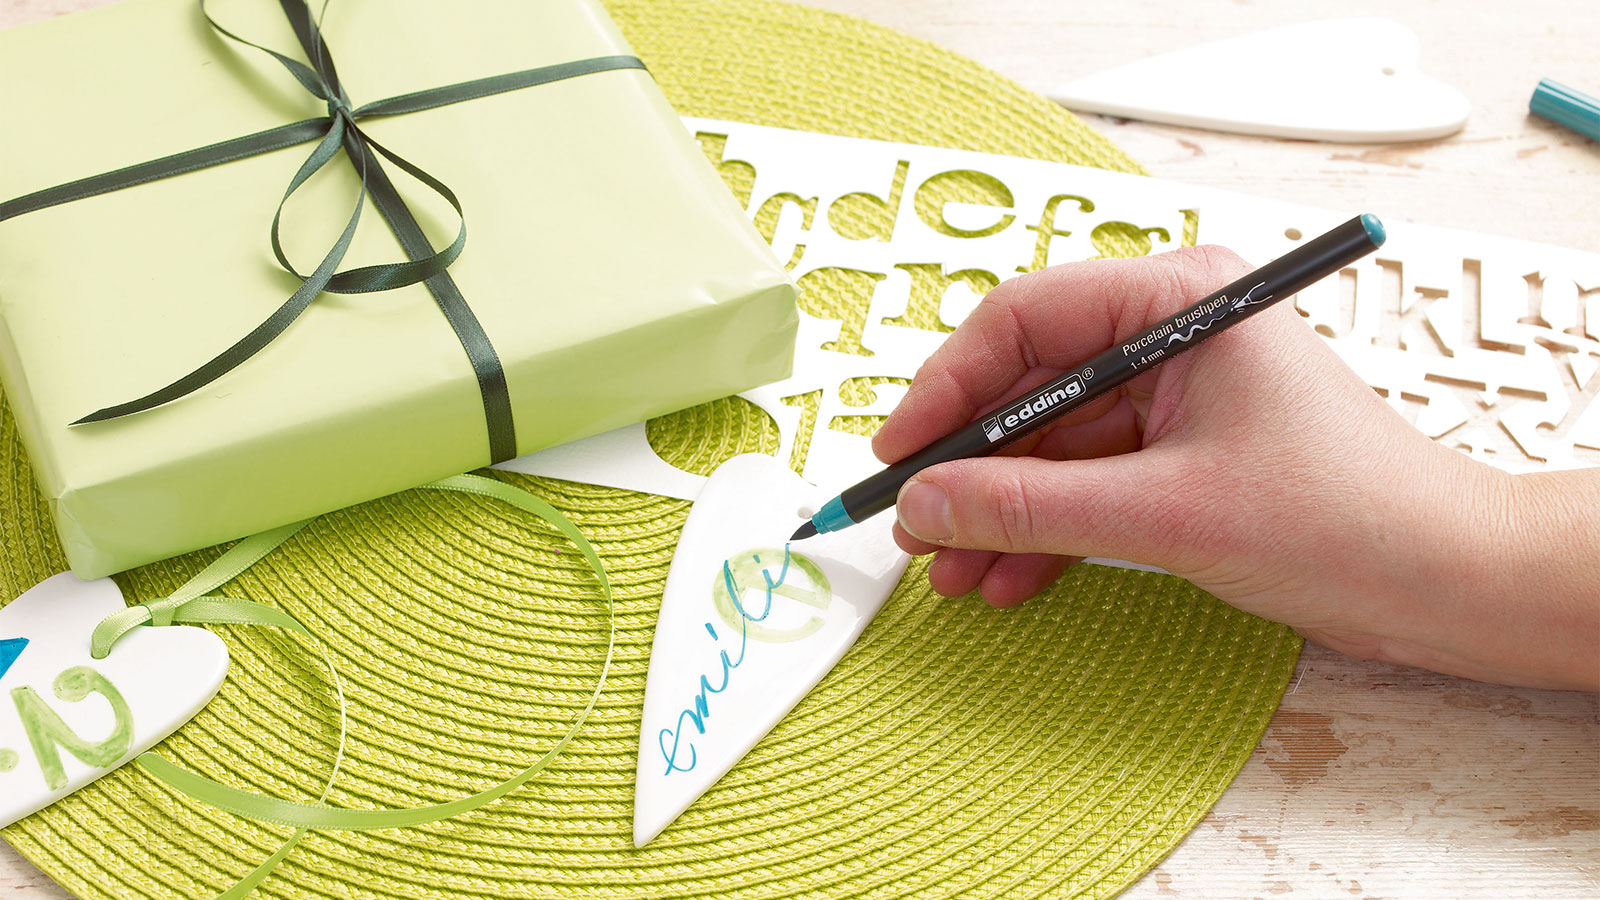
Practise writing out the name on a piece of paper first. If you make a mistake, remove it immediately with a damp cloth or cotton bud.
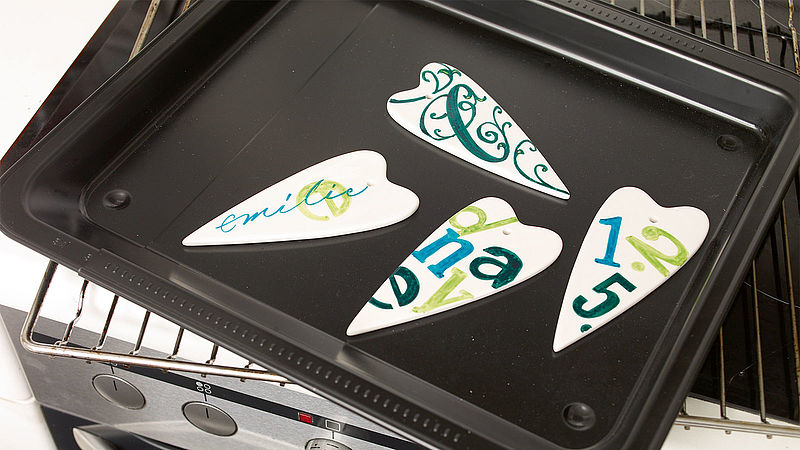
Step 3
Once you’ve finished painting, place the porcelain heart in the oven to fix the design. Allow the paint to dry for approx. 15 minutes before baking in a preheated oven at 160°C for 25 minutes. After baking, leave it in the oven to cool down. The design on your heart is now dishwasher-safe. Daily cleaning tip: avoid friction and rubbing by positioning the item in the dishwasher so it doesn't come into contact with other items of crockery or cutlery.
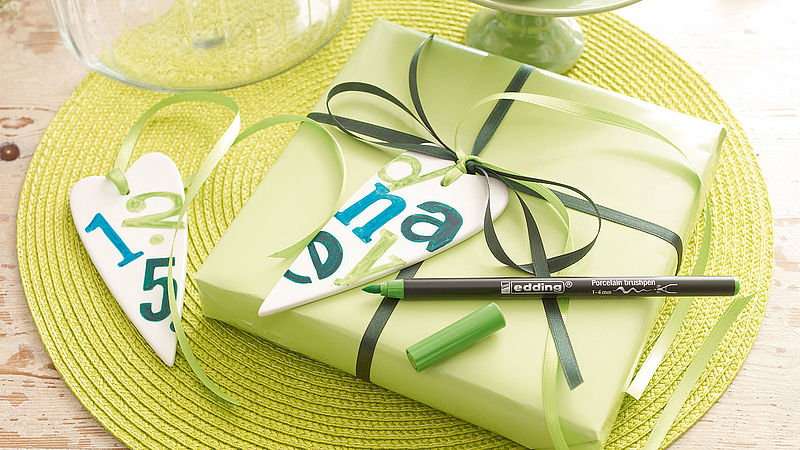
Step 4
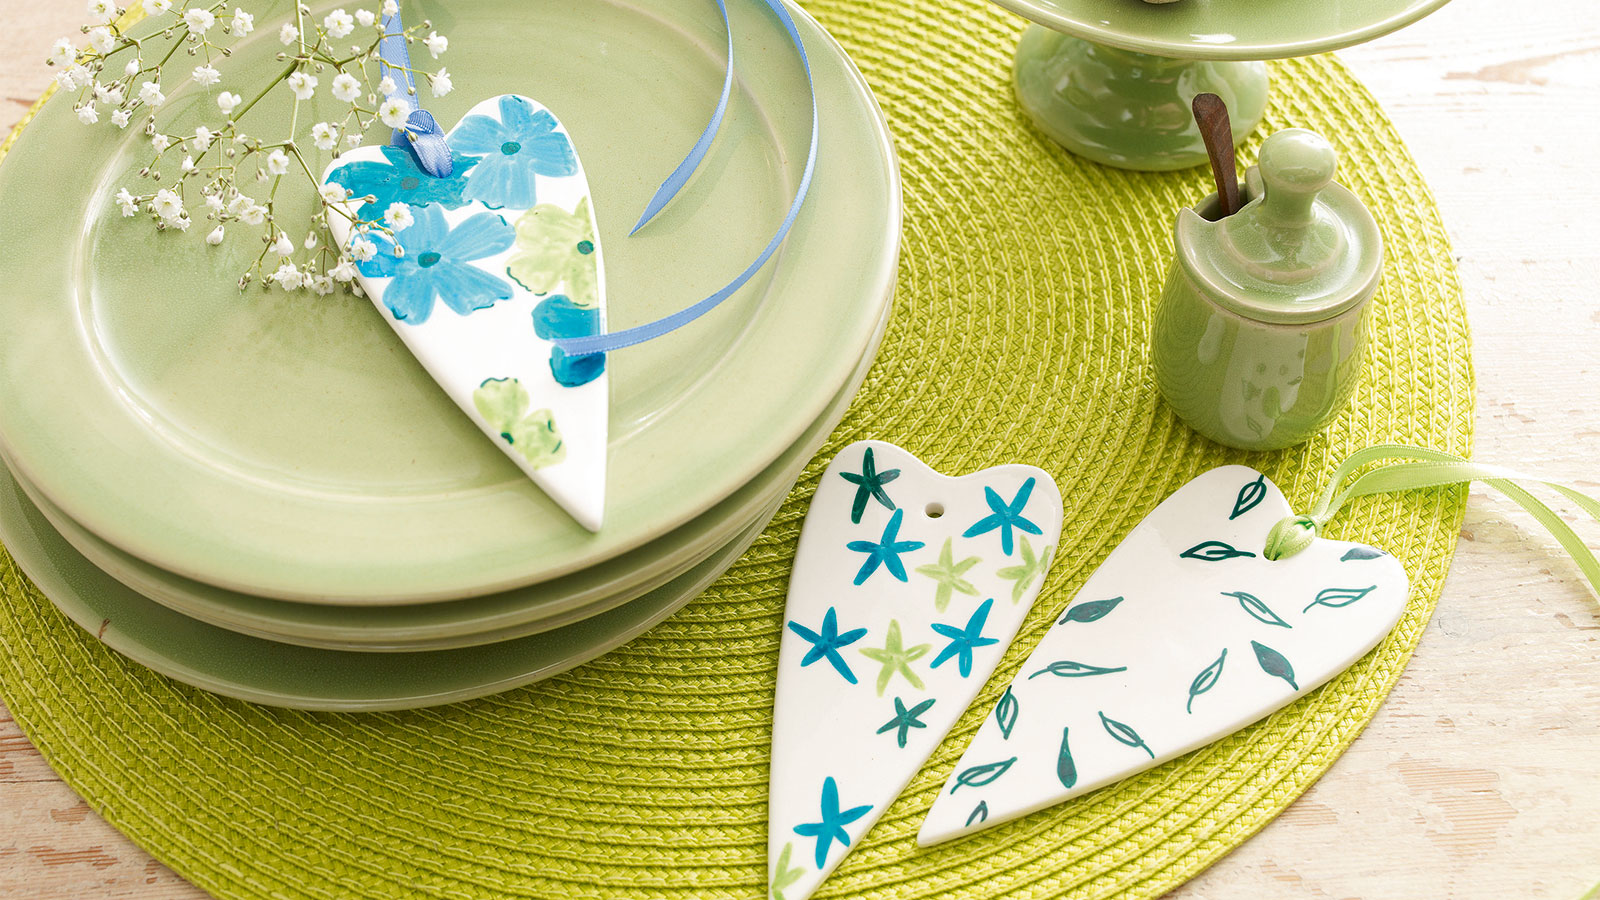
These porcelain hearts also work beautifully as gift tags. Just add tiny flower swirls or other decorative patterns. Finally, thread a ribbon through the hole. This is a simple yet stylish way to jazz up gift vouchers and the like.
Products and materials

Other materials
- Hearts made of light-coloured porcelain
- Methylated spirits for cleaning the porcelain surface
- A damp cloth or cotton bud to wipe off any mistakes
- Coloured ribbon (optional)
- Letter templates (optional)
- A domestic oven


Additional images
Related ideas

Create your own concrete look
Unique upcycled bedside table

Upcycling idea for an old chest of drawers
A stylish new look for planters

Placemat upcycling idea
A stylish addition for your dinner table

Your very own designer side table
Create an eye-catching piece of furniture with this fun upcycling project
Repair scratches in your wooden floor
DIY hack: the simple way to get rid of dents and scratches
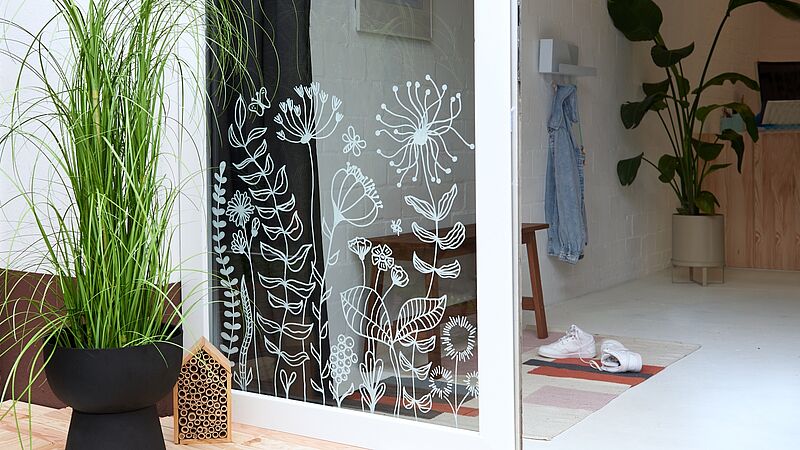
Magical flowers on your window
Decorate your windows and glass doors with striking floral designs
Creative Newsletter
Subscribe to our newsletter, and we’ll send you inspirational and creative DIY ideas, along with details of our latest products and special offers.