
Step-by-step
Step 1
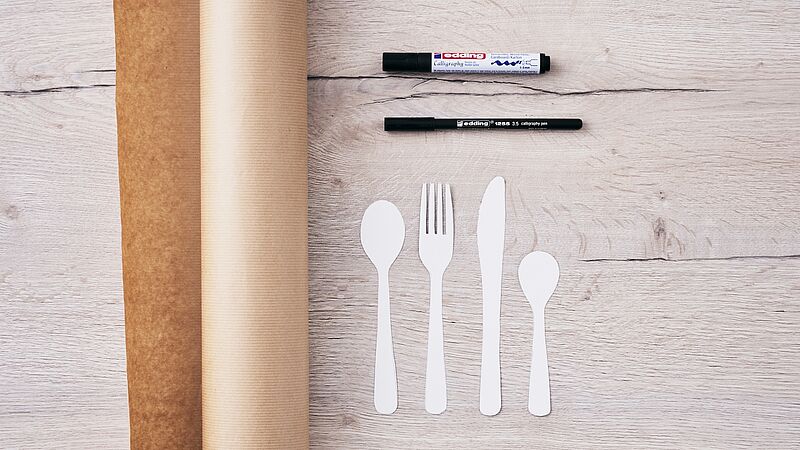
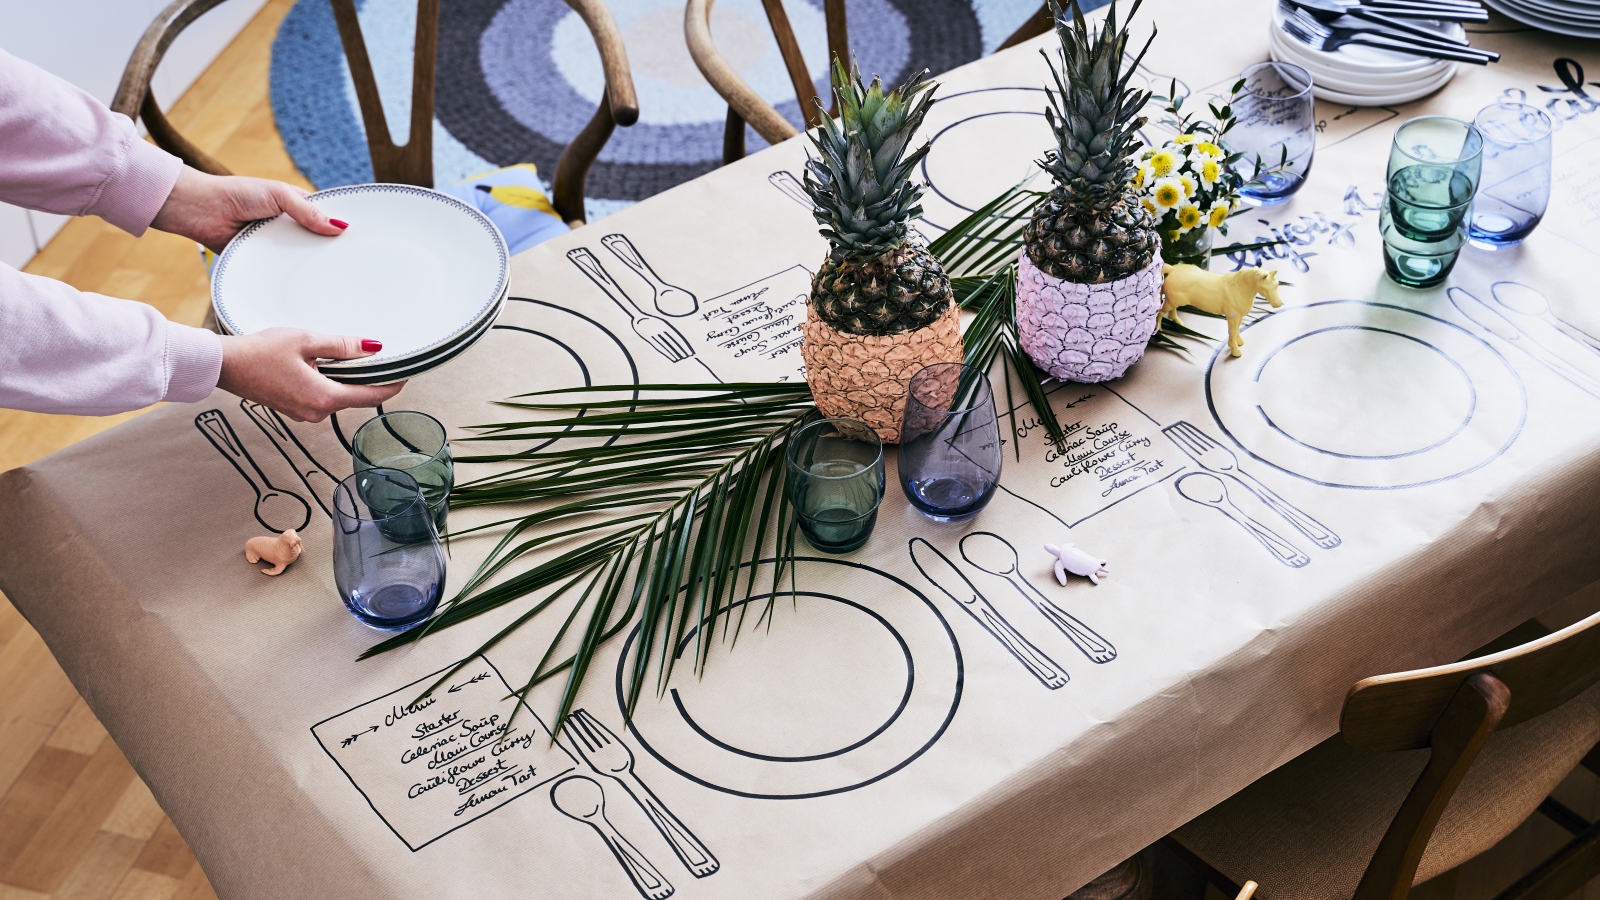
Our photo shows you at a glance all the materials you need to make this table decoration. You may need a second roll of packing paper, depending on the size of the table. Download the “cutlery” template on our website. Print it out and cut out all the shapes. It looks better if you make the individual pieces of cutlery life-sized, so you may need to enlarge the template.
Step 2
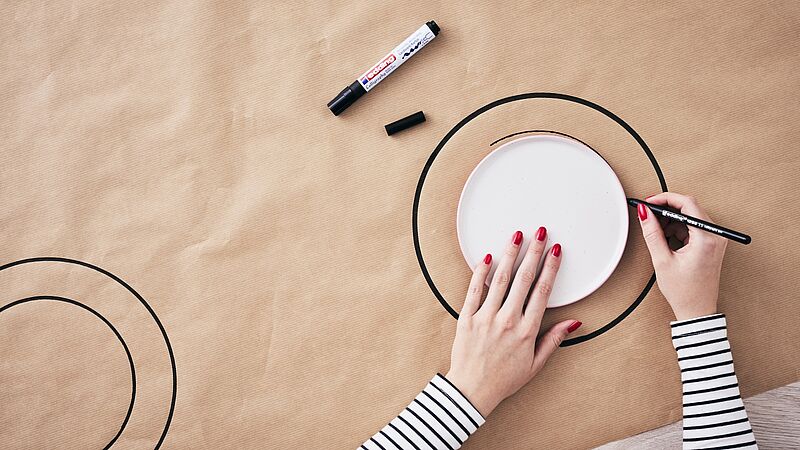
Start by drawing the plates on the paper. Using the black edding 1255 calligraphy pen, draw a smaller circle surrounded by a larger one. Full-sized plates make a useful template for this.
Step 3
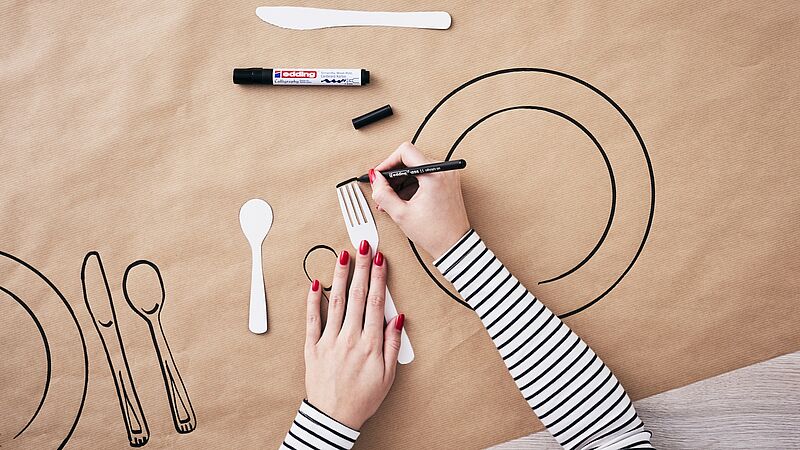
Continue in the same way with the pieces of cutlery. Before you write the menu, we recommend you practise with the calligraphy pen first. To achieve beautifully expressive calligraphy, always hold the pen at the same angle and don’t let it rotate. If you want to learn more about writing with calligraphy pens, click here to see our calligraphy training course.
Products and materials


Other materials
- 1 roll brown packing paper (length and width to suit the size of the table)
- edding 1255 calligraphy pen in black, stroke width 3.5 mm
- “Cutlery” template
- Scissors
Templates

Cutlery 2
Additional images
Related ideas

Create your own concrete look
Unique upcycled bedside table

Upcycling idea for an old chest of drawers
A stylish new look for planters

Placemat upcycling idea
A stylish addition for your dinner table

Your very own designer side table
Create an eye-catching piece of furniture with this fun upcycling project
Repair scratches in your wooden floor
DIY hack: the simple way to get rid of dents and scratches
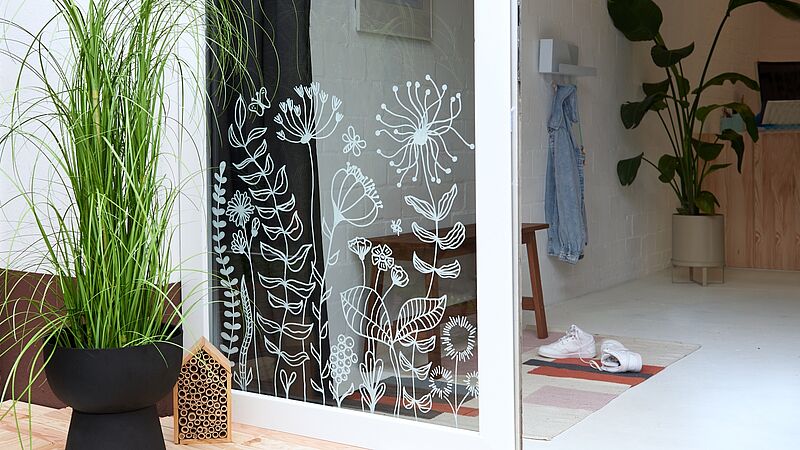
Magical flowers on your window
Decorate your windows and glass doors with striking floral designs
Creative Newsletter
Subscribe to our newsletter, and we’ll send you inspirational and creative DIY ideas, along with details of our latest products and special offers.