
Step-by-step
Step 1
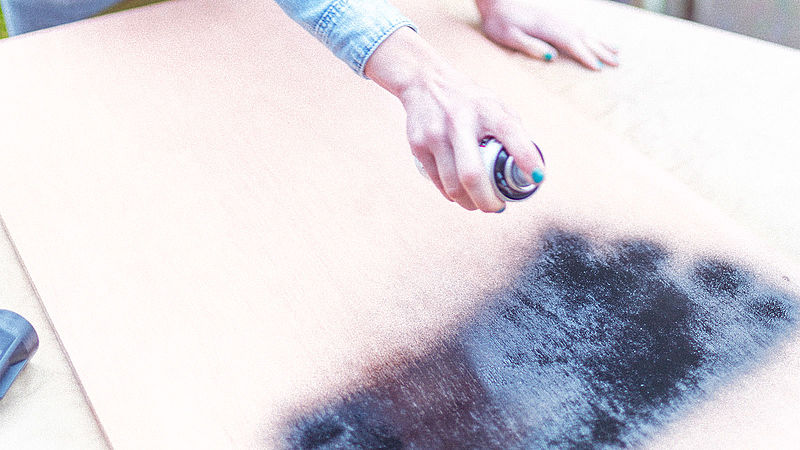
Think of a nice saying or search the Internet for a quote. In our example, we chose the saying “Home is where the heart is”. Buy a sheet of MDF in a size that looks right for you. It’s best to find a suitable place to work outdoors to spray the board with edding Permanent Spray. Cover your work area well with plenty of paper (or other protective covering) to avoid unwanted marks. For best results, we recommend spraying the board with a universal primer as a base layer – and edding Permanent Spray Universal Primer is excellent for almost any material, including MDF. Take the edding Permanent Spray Spray in black, shake the can well and spray evenly until the board is covered, moving your arm steadily back and forth as you spray. This ensures a more even jet of paint so you will achieve a perfect result without hassle. Allow the board to dry thoroughly.
Step 2
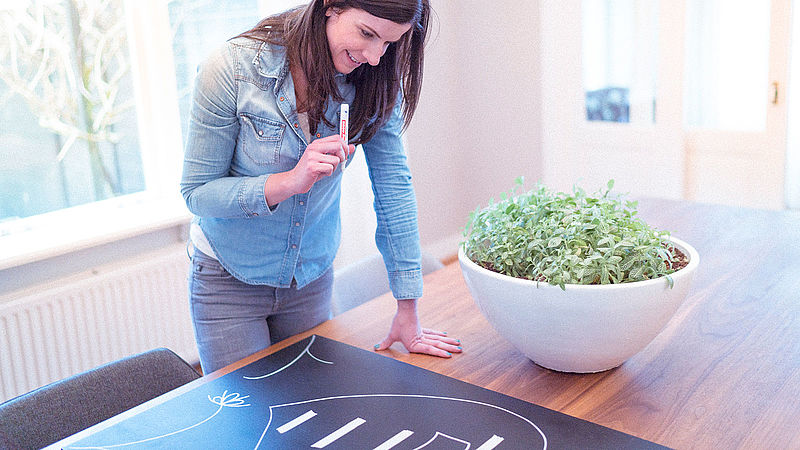
Naturally, you'll want to achieve the best possible result, so we recommend using strips of masking tape as guide lines before starting the lettering. These lines can be used to plan your letter spacing, which makes the writing a bit easier. Stick the lines on any way you like and simply remove them afterwards. Or you could even incorporate them into your overall piece as a form of decoration.
Now it's time for the actual hand lettering. Practise your chosen style of writing on paper first. When you've got a word just how you want it, transfer it onto the blackboard. Write the letters individually, leaving a set distance between them to give a balanced overall design.
Step 3
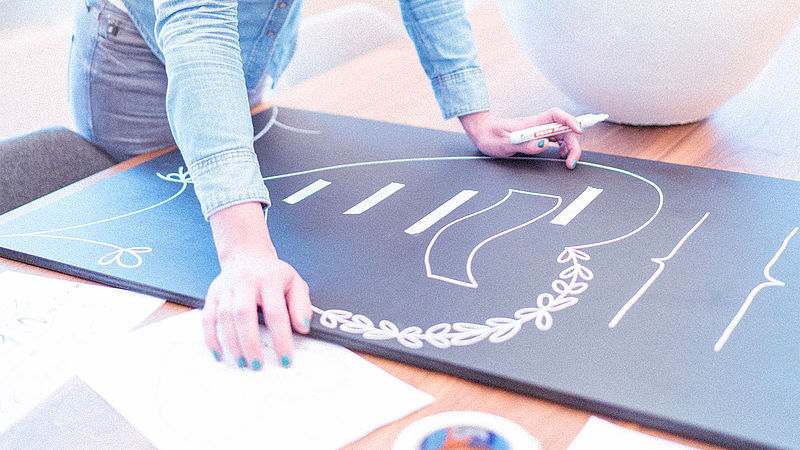
Why not try adding shading to your letters or embellish them with vines or garlands? Starting with just the letters, gradually add more and more strokes and flourishes until – step by step – you've perfected the overall picture to your satisfaction. If you make a mistake, there’s no need to worry: if the surface is non-porous, your artwork can simply be wiped off with a damp cloth at any time. And don’t forget, practice makes perfect!

Step 4
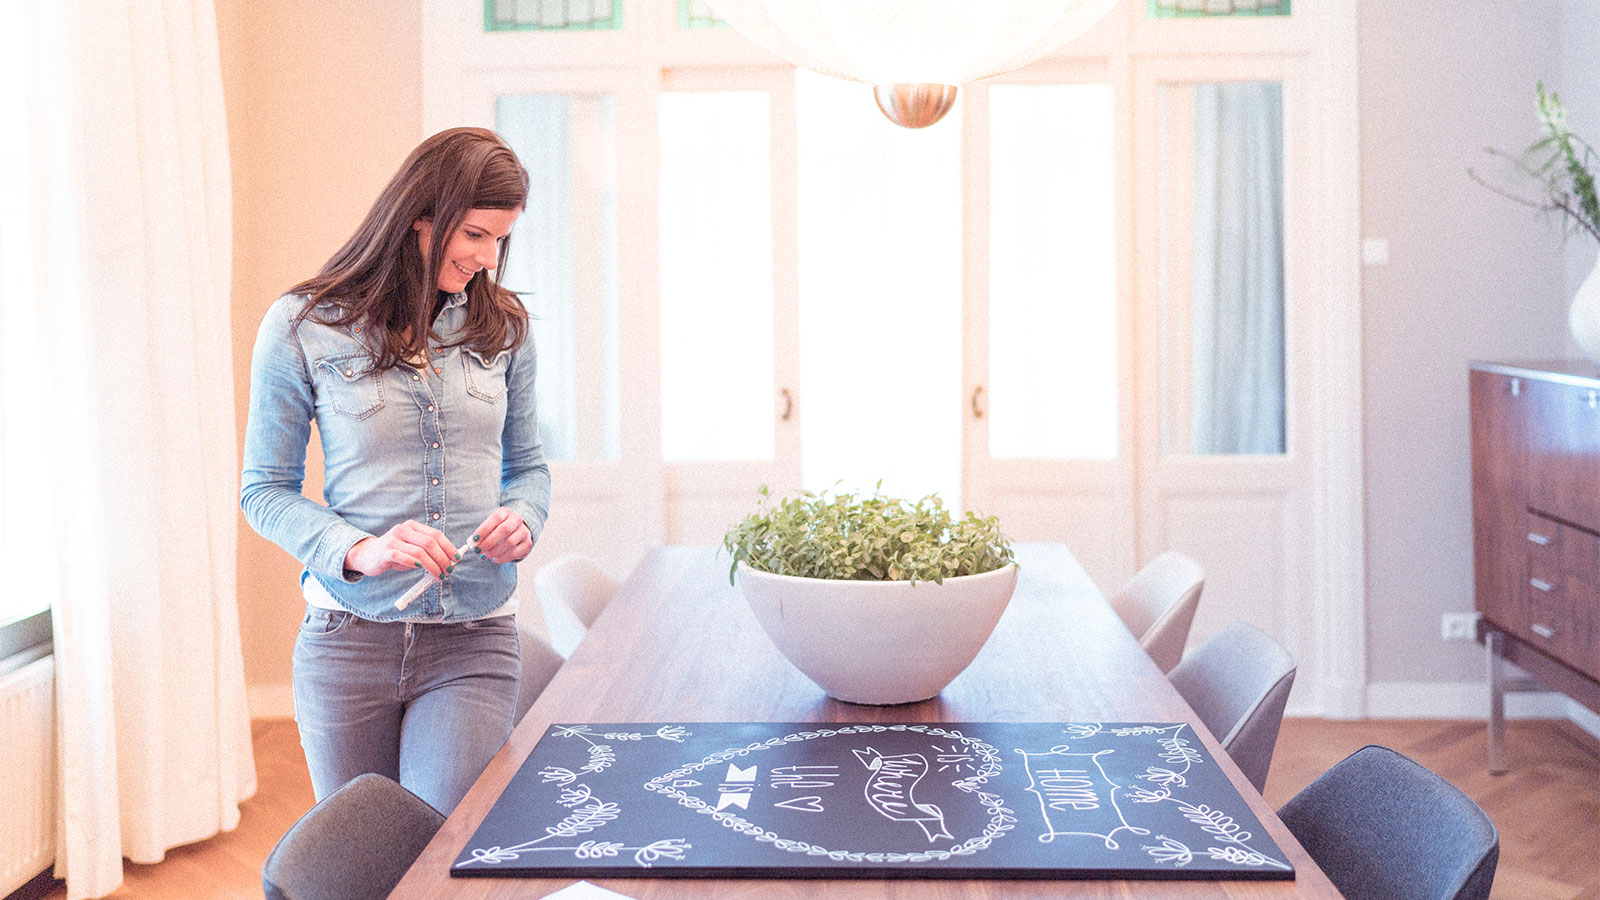
What should you do if all your letters are positioned correctly, but you’re still not quite happy with the result? Just keep adding little drawings or embellishments to give the design more expression. When the board is finished, find a nice place to hang up or display your work of art.
Products and materials


Other materials
- Sheet of medium density fibreboard (MDF)
- Masking tape
- Paper for testing
- Something to cover your work area and protect it from spray marks
Additional images
Related ideas

Create your own concrete look
Unique upcycled bedside table

Upcycling idea for an old chest of drawers
A stylish new look for planters

Placemat upcycling idea
A stylish addition for your dinner table

Your very own designer side table
Create an eye-catching piece of furniture with this fun upcycling project
Repair scratches in your wooden floor
DIY hack: the simple way to get rid of dents and scratches
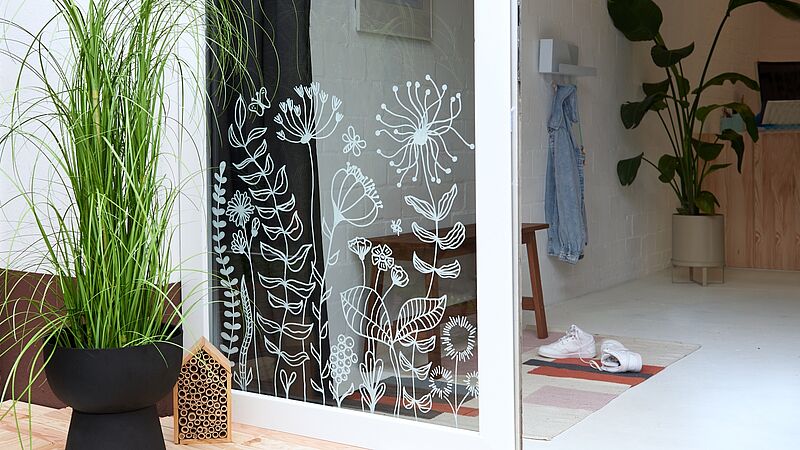
Magical flowers on your window
Decorate your windows and glass doors with striking floral designs
Creative Newsletter
Subscribe to our newsletter, and we’ll send you inspirational and creative DIY ideas, along with details of our latest products and special offers.